How to make the Best Portuguese Egg Tart, Pastel de Nata
Table of Contents

INGREDIENTS
INSTRUCTIONS

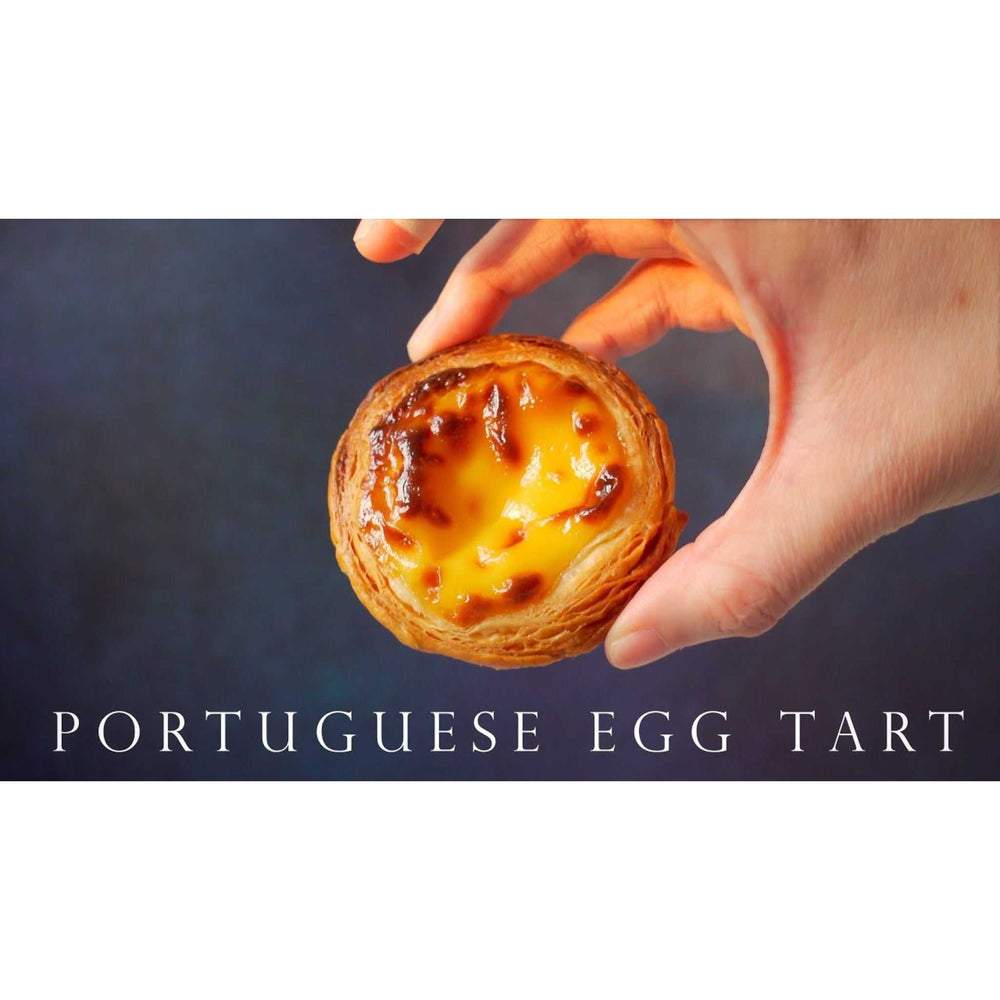
Imagine biting into a warm, golden pastry with a flaky crust that shatters delicately, revealing a creamy custard filling. That’s the magic of pastel de nata, a famous Portuguese dessert that has captured hearts worldwide. Originating in Lisbon during the 18th century, these traditional pastéis de nata are baked to perfection, often dusted with cinnamon or powdered sugar. Known for their lightness and sweet, balanced flavor, they’ve even been named one of the "50 best things to eat in the world." Let’s explore how to make pastel de nata and bring this iconic treat to your kitchen.
Recipe Card: How to Make Pastéis de Nata
Here’s the complete recipe card to guide you through making these irresistible Portuguese egg tarts. Follow these steps, and you’ll have a batch of golden, flaky, and creamy pastéis de nata ready to impress.
Ingredients
For the Dough:
Unsalted butter: 30g (about 1/8 cup)
All-purpose flour: 150g (1 1/4 cups)
Salt: 2g (a pinch)
Sugar: 3g (about 1/2 teaspoon)
Water: 60ml (1/4 cup)
Unsalted butter for layering: 80g (1/3 cup)
For the Custard Filling:
Whole egg: 20g (about half an egg)
Egg yolks: 2
Sugar: 45g (3 tablespoons)
Whipping cream: 150ml (2/3 cup)
Milk: 75ml (1/3 cup)
Optional: Vanilla extract, lemon zest, or cinnamon for added flavor
Tip: Measure all ingredients accurately to ensure the best results. Using a kitchen scale or measuring cups can make this process easier and more precise.
Step-by-Step Instructions
1. Prepare the Dough:
Combine flour, salt, sugar, and water in a mixing bowl. Mix until it forms a smooth dough. Knead gently on a floured surface until elastic. Wrap in plastic wrap and refrigerate for 30 minutes.
Roll out the butter between two sheets of parchment paper to about 3mm thick. Chill it while the dough rests.
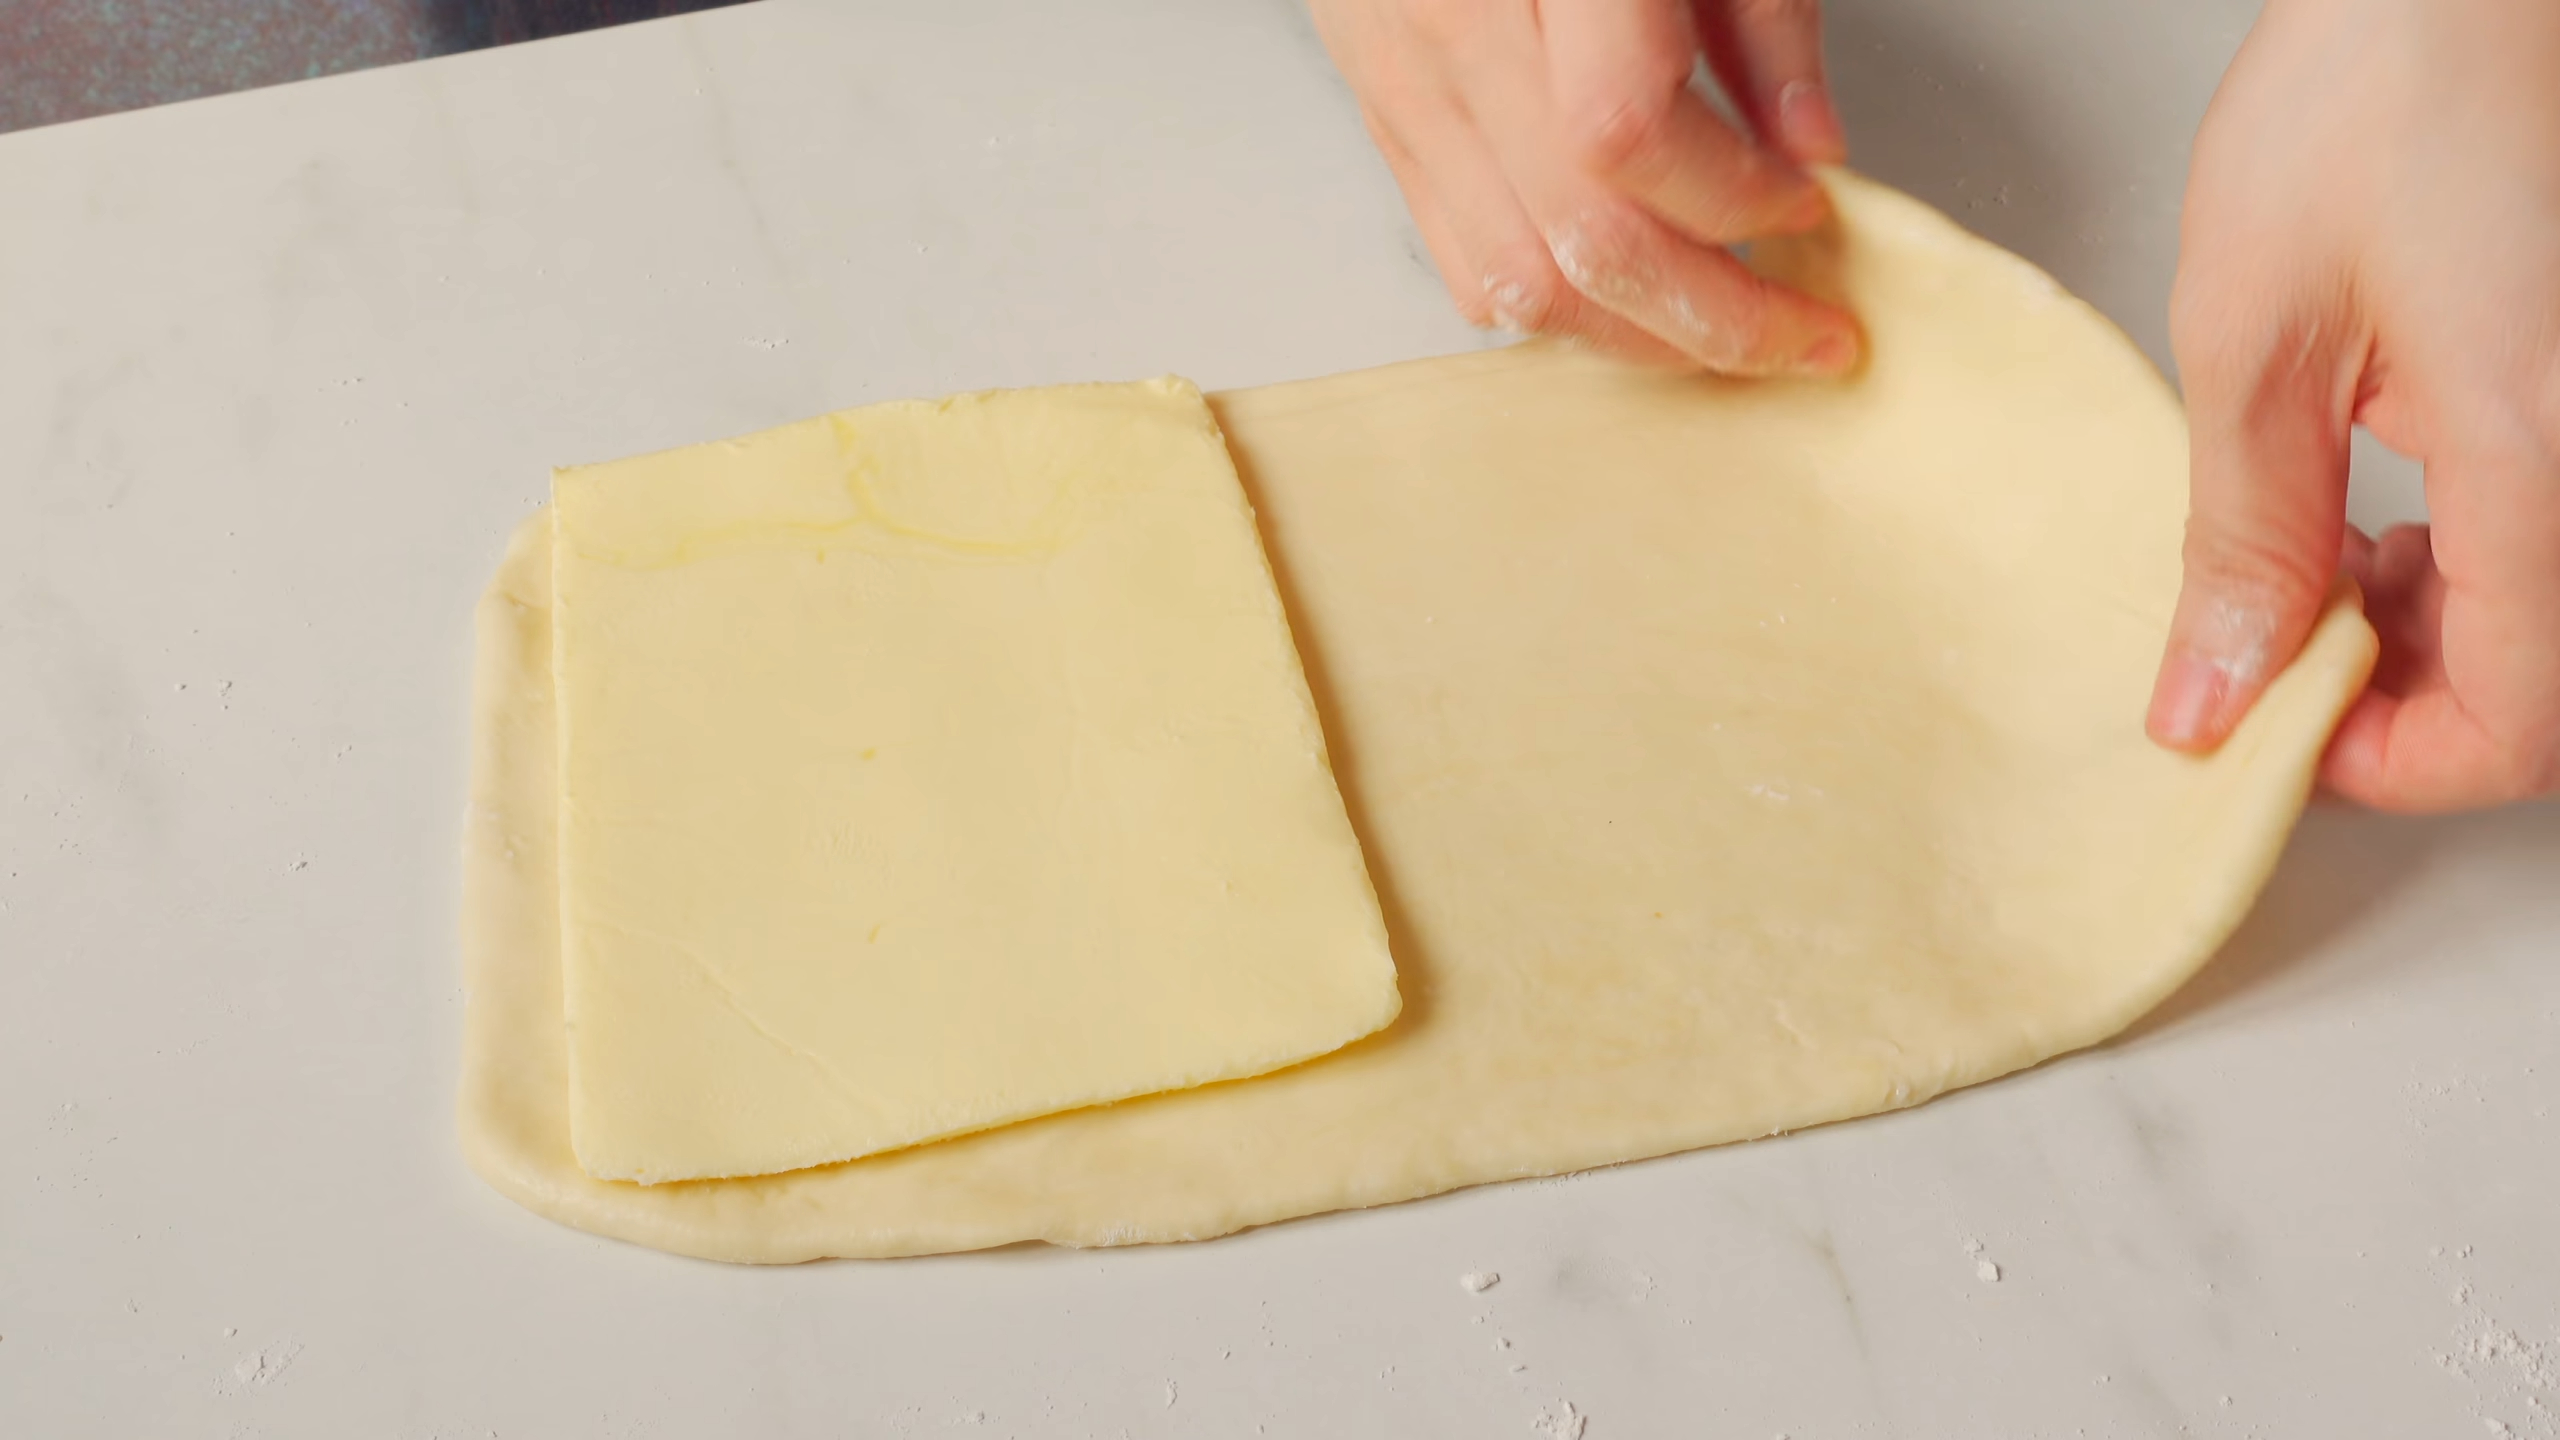
Roll the dough into a rectangle slightly larger than the butter sheet. Place the butter on one half of the dough. Fold the other half over the butter and seal the edges.
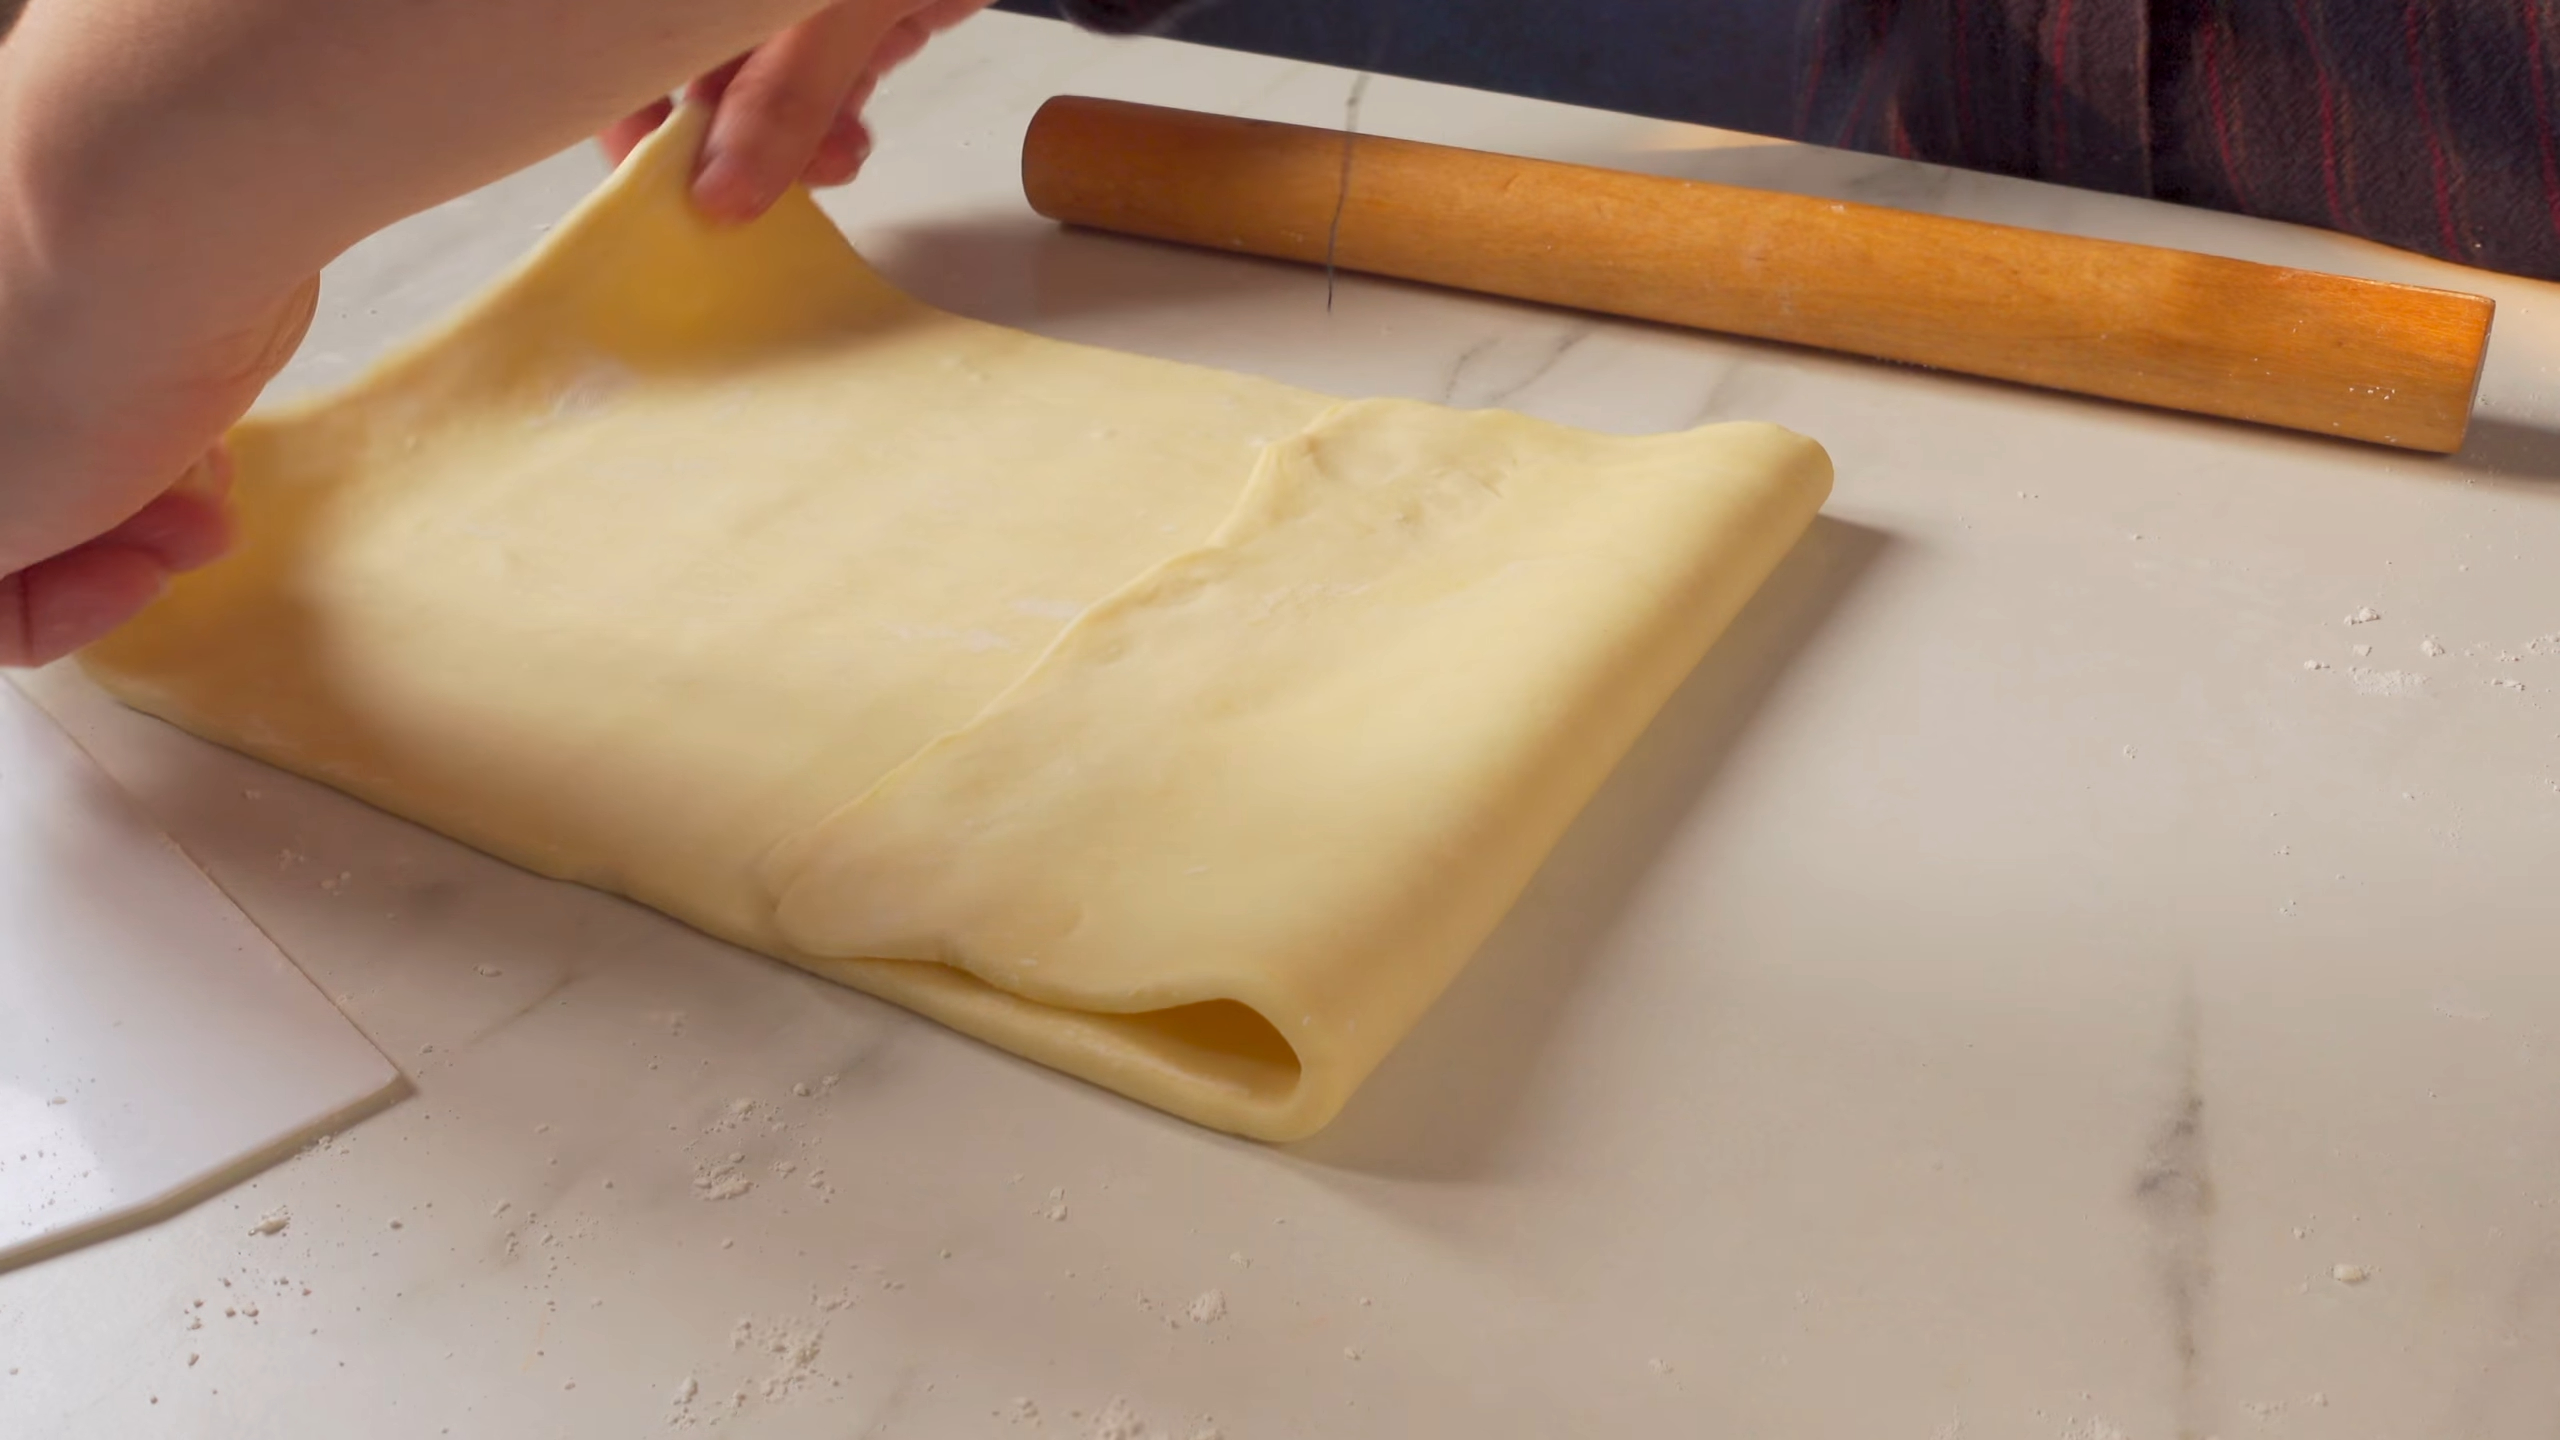
Roll the dough into a long rectangle. Fold it into thirds like a letter. Wrap it and refrigerate for 30 minutes. Repeat this process two more times to create layers.
2. Shape the Dough:
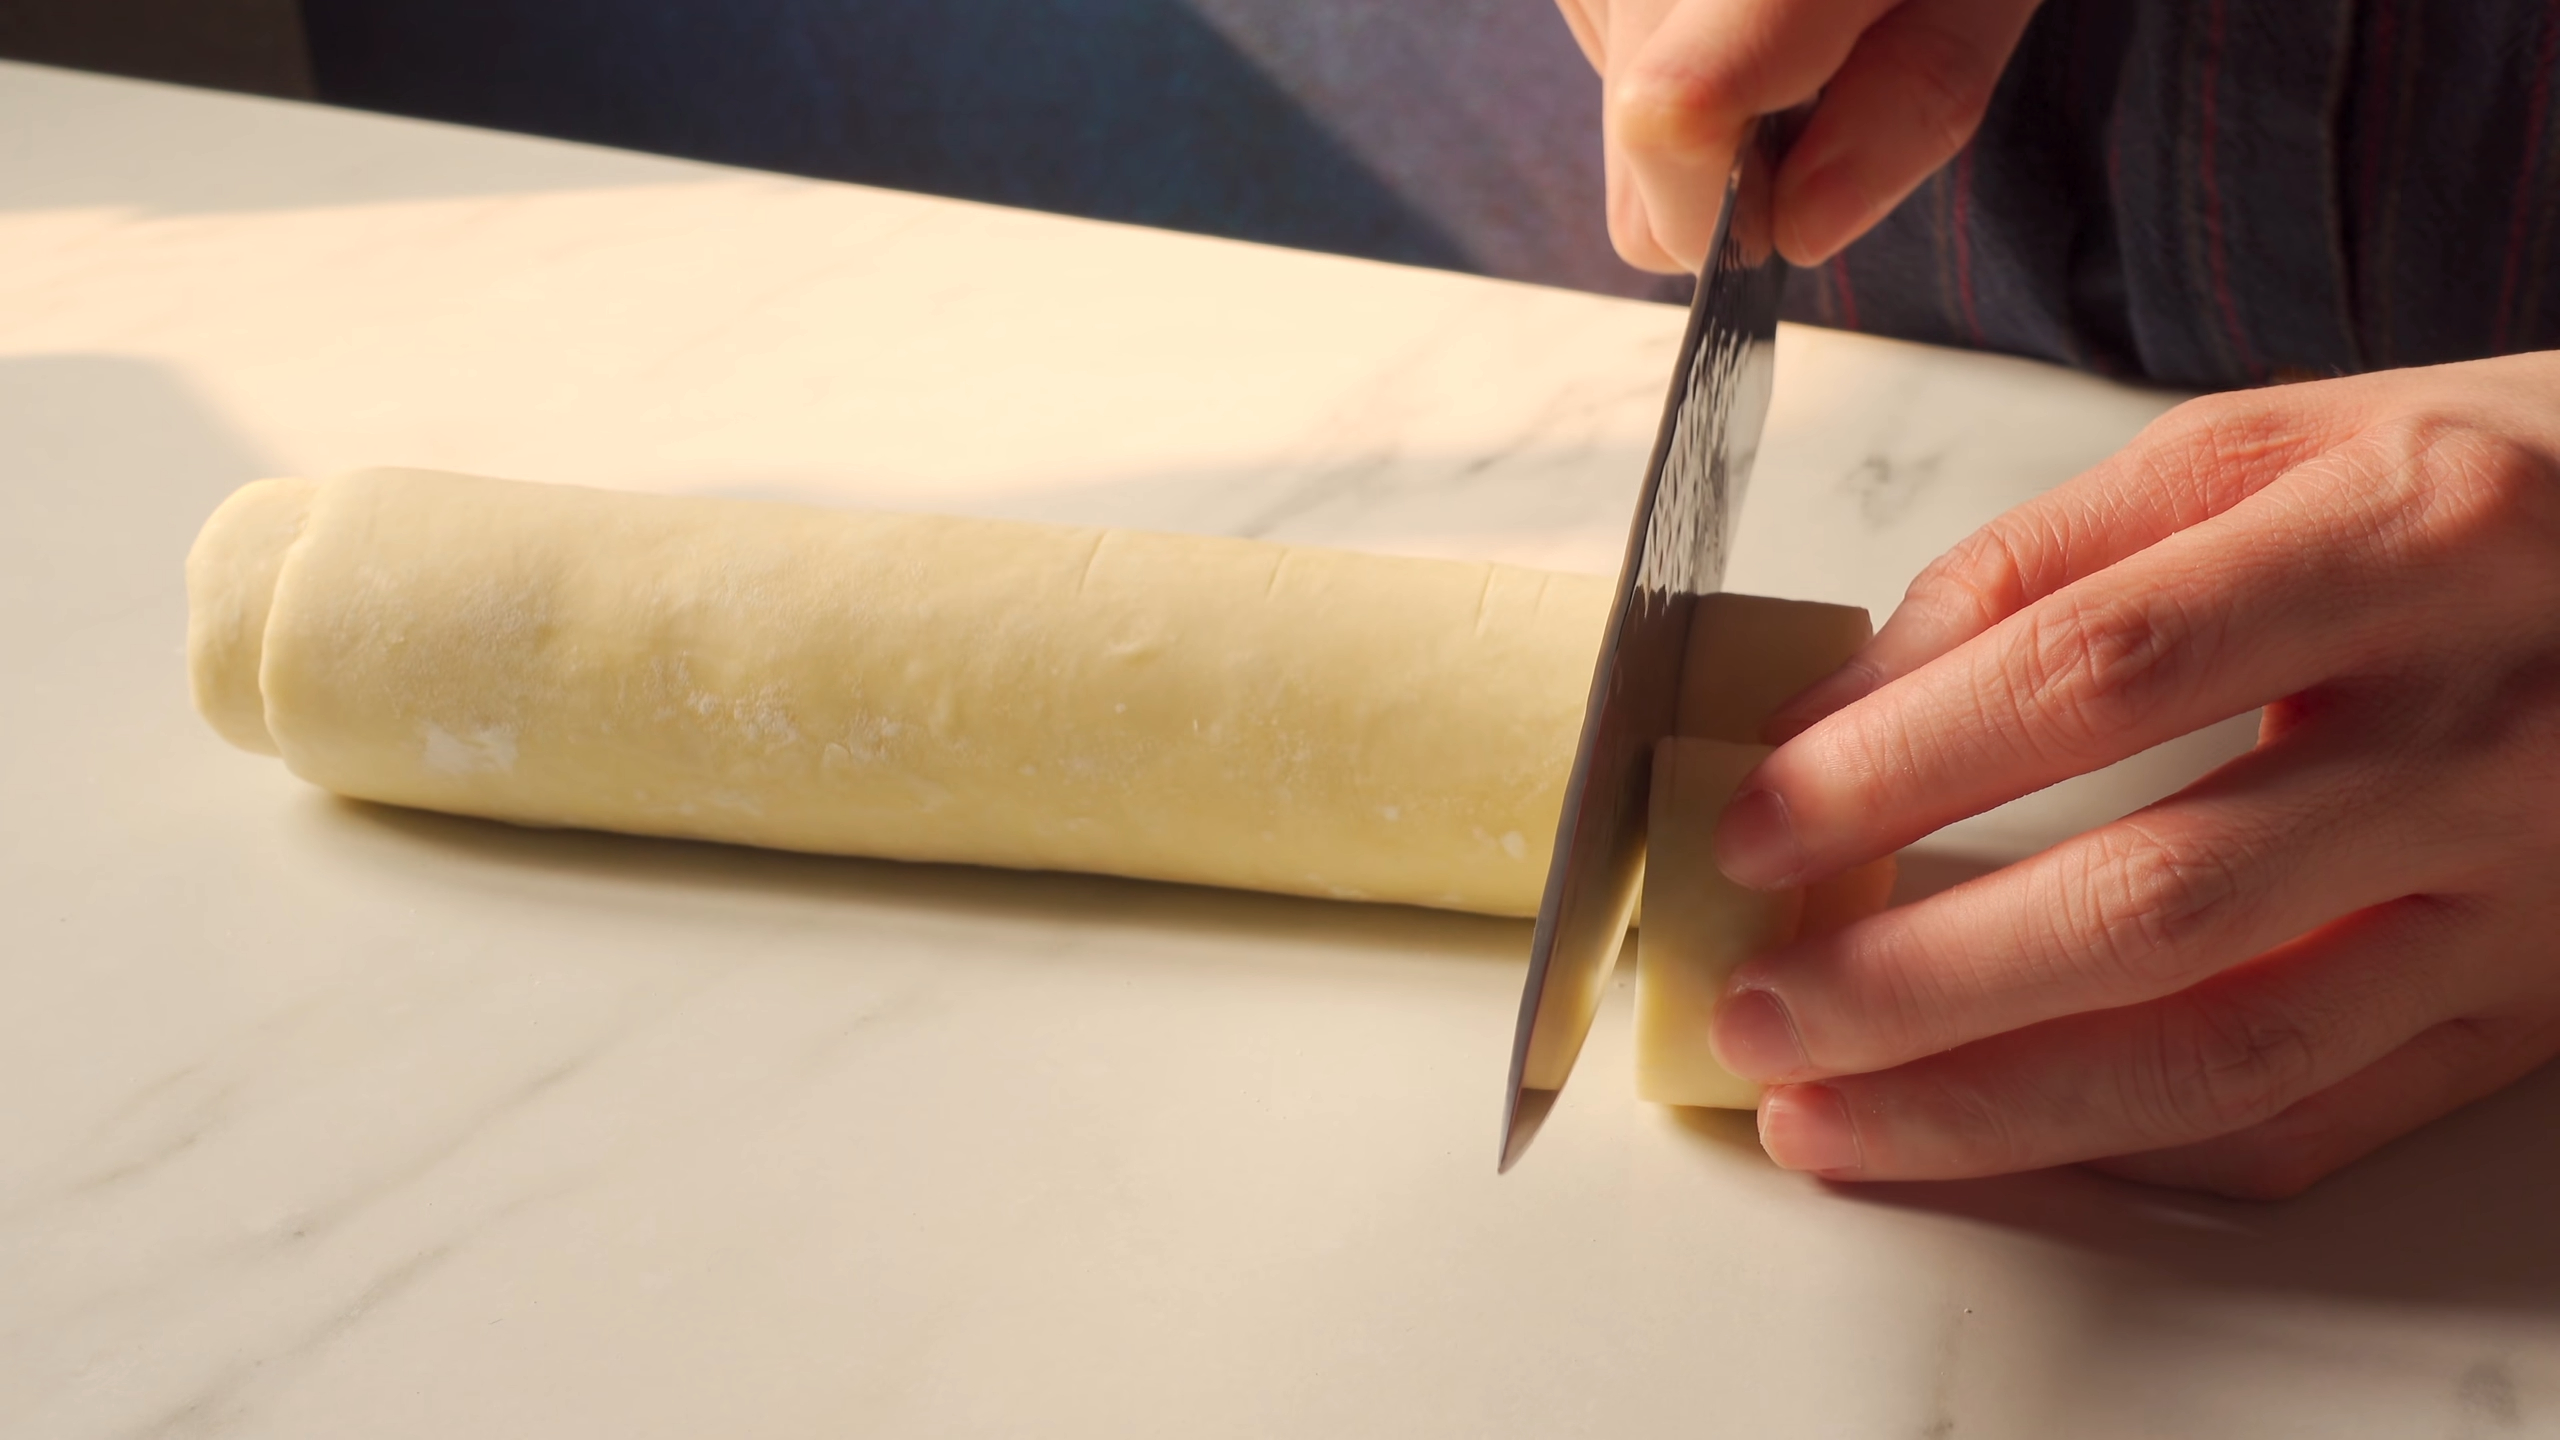
Roll the dough into a thin rectangle, about 3mm thick. Starting from the shorter side, roll it tightly into a log. Wrap and chill for at least 30 minutes.
Slice the dough log into 2cm-thick rounds. Press each round into a tart mold, working the dough up the sides. Freeze the shells for 10 minutes.
3. Make the Custard Filling:
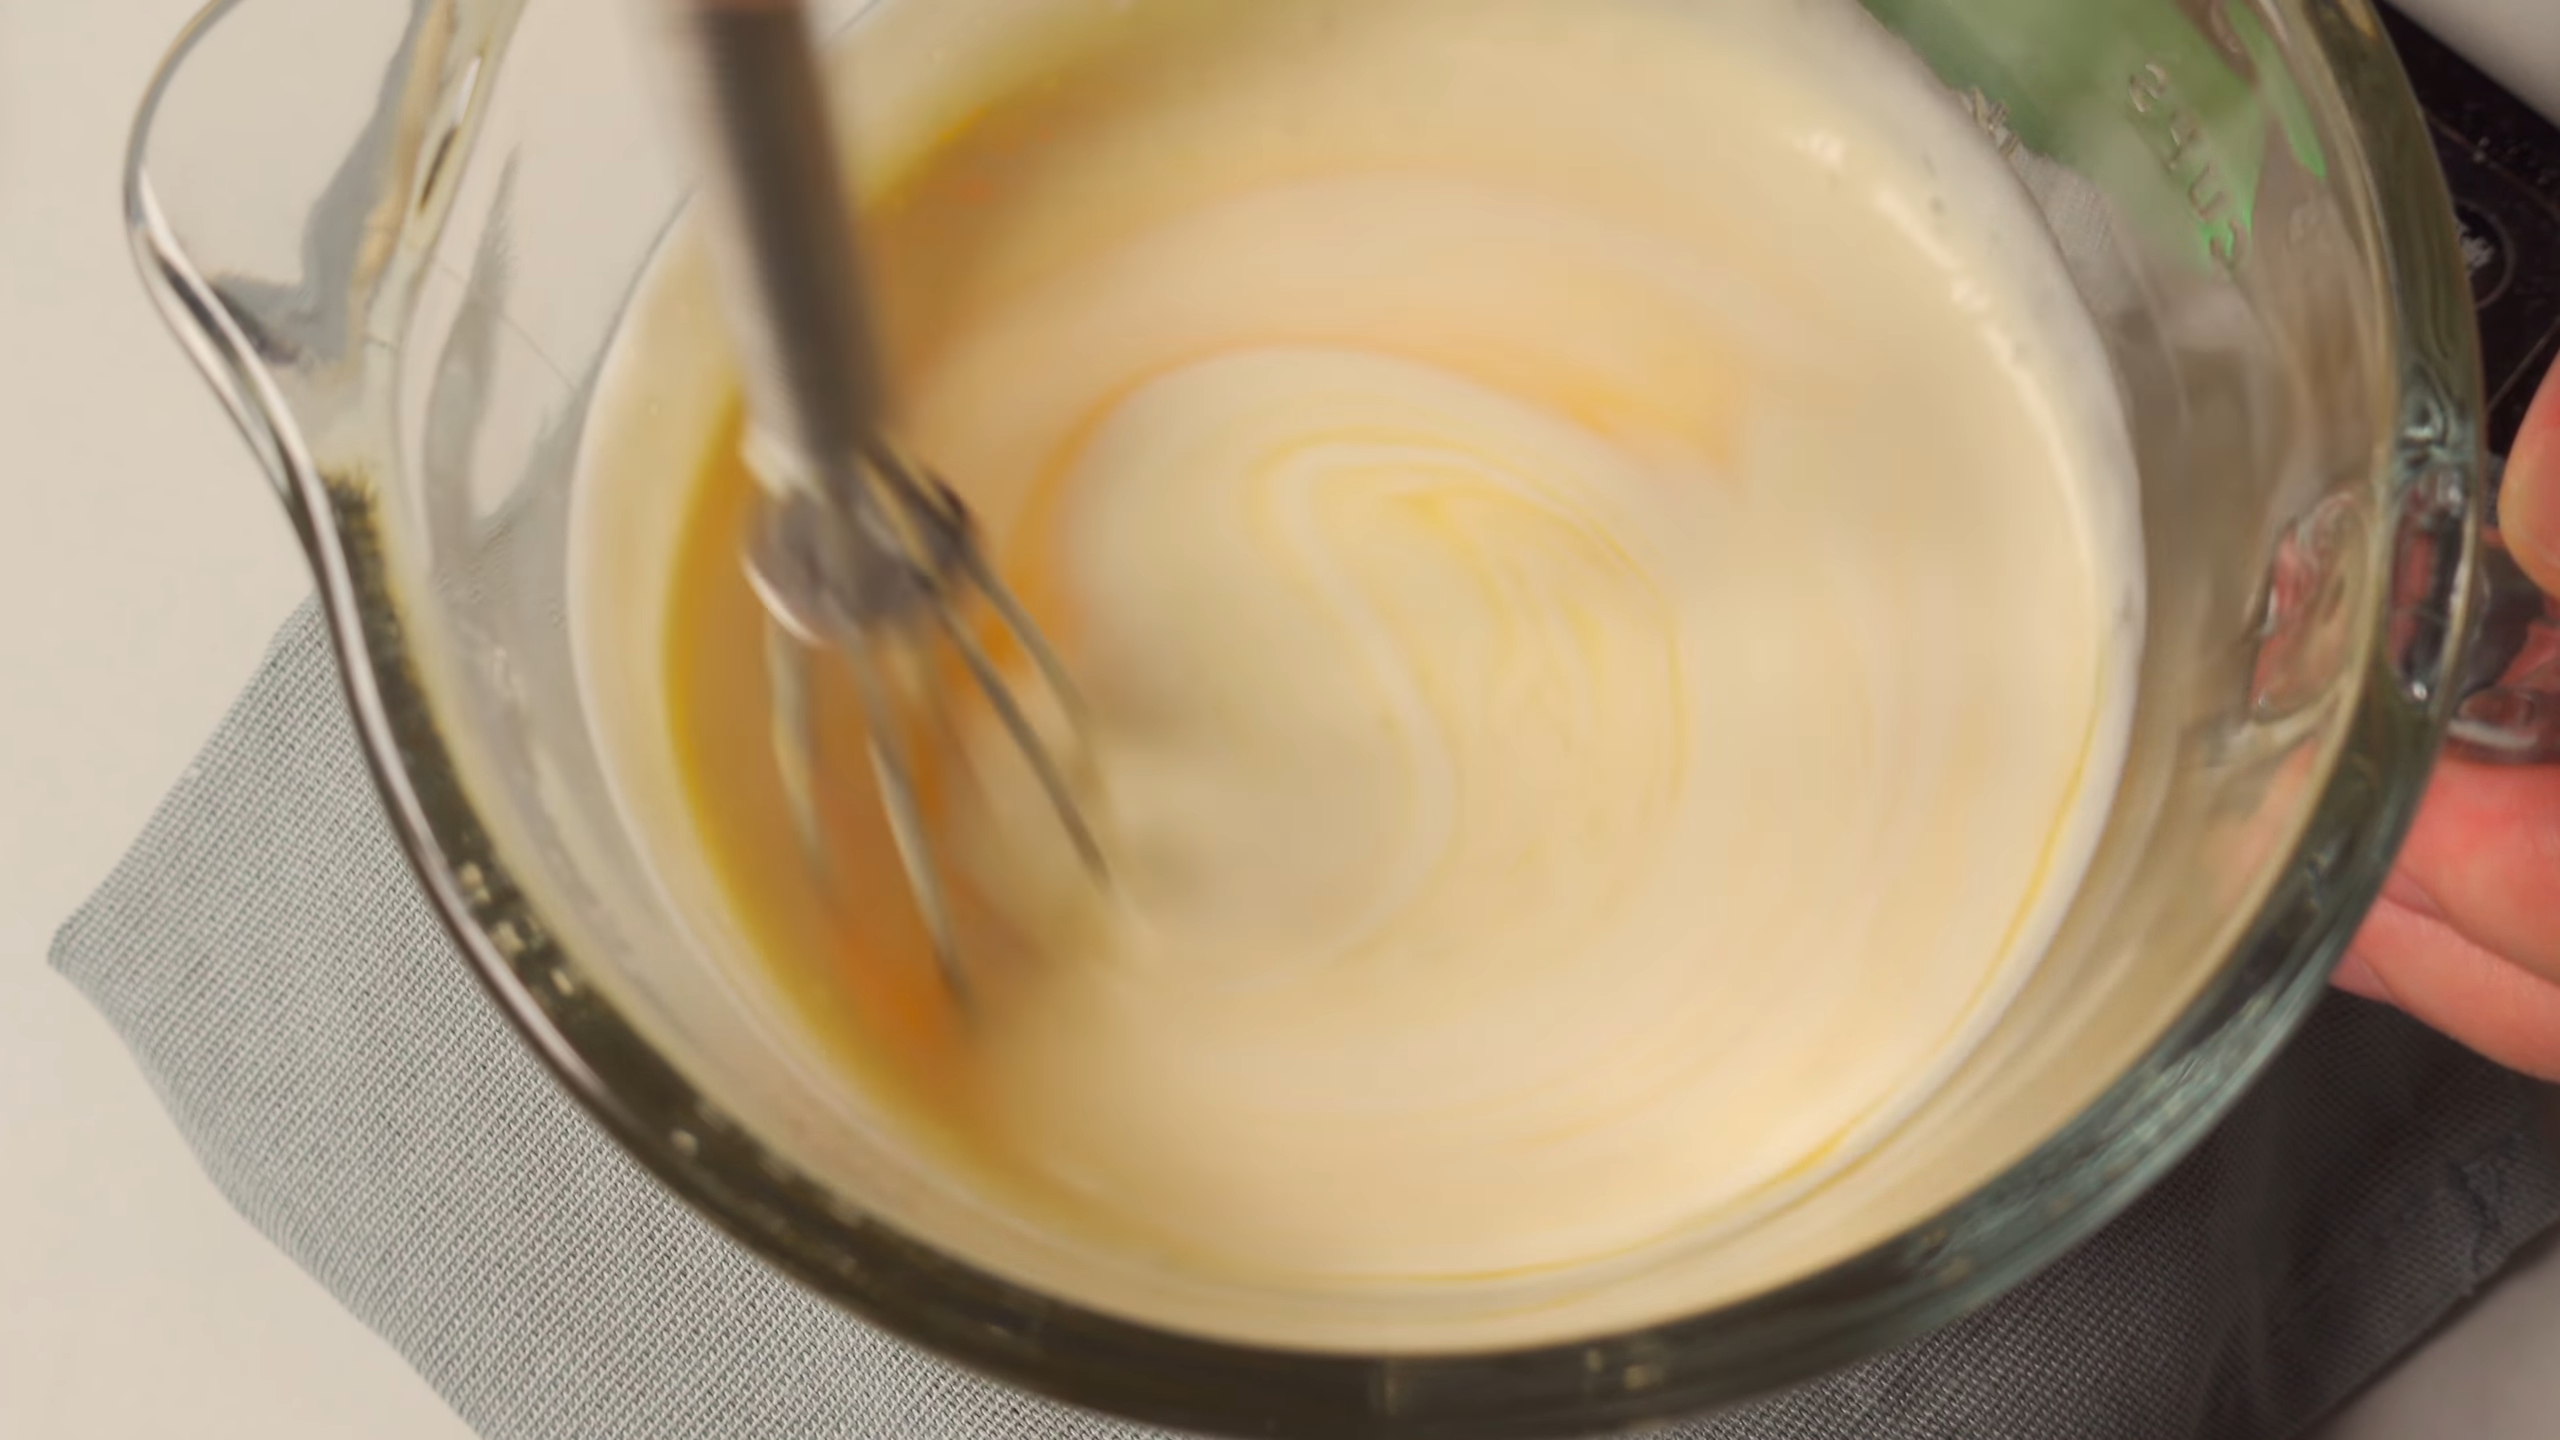
Whisk the whole egg, egg yolks, sugar, whipping cream, and milk in a bowl until smooth. Cover and refrigerate for 30 minutes to let the sugar dissolve.
4. Assemble and Bake:
Preheat the oven to 210°C (410°F).
Fill each tart shell with custard, about 80% full. Place the molds on a baking sheet lined with foil.
Bake on the middle rack for 23-25 minutes. Look for a caramelized top and golden pastry edges.
Let the tarts cool in the molds for a few minutes before transferring them to a wire rack.
Pro Tip: Serve the tarts warm for the best experience. Sprinkle a little cinnamon or powdered sugar on top for a traditional touch.
Notes and Variations for the Recipe
Flavor Variations: Add a splash of vanilla extract or a pinch of nutmeg to the custard for a unique twist. Lemon zest adds a refreshing citrus note.
Dough Shortcut: If you’re short on time, store-bought puff pastry can work as a substitute. It won’t be as authentic but still delivers a flaky crust.
Baking Adjustments: If your oven runs hot, reduce the temperature slightly to avoid burning the tops. Keep an eye on the tarts during the last few minutes.
Serving Ideas: Pair these tarts with espresso or black tea for a classic Portuguese experience.
This recipe is perfect for beginners and experienced bakers alike. With a little patience and attention to detail, you’ll master the art of making pastéis de nata in no time.
Ingredients for the Perfect Pastel de Nata
Creating the perfect pastel de nata starts with selecting the right ingredients. Each component plays a vital role in achieving the flaky crust and creamy custard that make this dessert so irresistible. Let’s break it down step by step.
Essential Ingredients for the Pastry Dough
The pastry dough forms the crisp, buttery base of the pastel de nata. To get that signature flakiness, you’ll need:
Unsalted butter: Use high-quality butter for a rich flavor. You’ll need 30g for the dough and 80g for layering (about 1/8 cup and 1/3 cup, respectively). The butter creates those delicate, crispy layers.
All-purpose flour: 150g (1 1/4 cups) of this versatile flour works perfectly for the dough. It provides structure without being too heavy.
Salt: Just 2g (a pinch) enhances the flavor of the pastry.
Sugar: A small amount, 3g (about 1/2 teaspoon), balances the savory notes of the butter.
Water: 60ml (1/4 cup) binds everything together, creating a smooth dough.
These ingredients combine to create a dough that’s easy to work with and bakes into a golden, flaky crust.
Key Ingredients for the Custard Filling
The custard filling is the heart of the pastel de nata. It’s creamy, sweet, and slightly caramelized on top. Here’s what you’ll need:
Whole egg and egg yolks: Use 20g of whole egg (about half an egg) and 2 egg yolks. The yolks give the custard its rich, velvety texture.
Sugar: 45g (3 tablespoons) sweetens the custard just enough without overpowering it.
Whipping cream and milk: Combine 150ml (2/3 cup) of whipping cream and 75ml (1/3 cup) of milk. This mixture creates a custard that’s creamy yet light.
Optional flavor enhancers: Add a touch of vanilla, lemon zest, or cinnamon for extra depth. These flavors complement the custard beautifully.
Each ingredient contributes to the custard’s smooth consistency and balanced sweetness.
Why These Ingredients Matter for Portuguese Custard Tarts
The magic of a Portuguese custard tart lies in the harmony between the crust and the filling. The butter in the dough ensures a flaky, crispy texture that contrasts with the creamy custard. Using egg yolks instead of whole eggs gives the filling its signature richness. The combination of cream and milk keeps the custard light while maintaining its luxurious texture.
Flavor enhancers like lemon zest and cinnamon add a subtle complexity. They elevate the custard without overpowering its natural sweetness. When baked at a high temperature, the sugar in the custard caramelizes, creating that iconic golden top.
By carefully choosing these ingredients, you’ll set yourself up for success in making authentic pastéis de nata that rival those from Lisbon’s finest bakeries.
How to Make the Pastry for Pastel de Nata
The pastry for pastel de nata is the foundation of its charm. A well-made dough transforms into a golden, flaky tart crust that perfectly complements the creamy custard filling. Let’s dive into the process step by step.
Preparing the Dough
Start by gathering your ingredients. Combine all-purpose flour, salt, sugar, and water in a mixing bowl. Use your hands or a spatula to bring the mixture together until it forms a smooth dough. Knead it gently on a floured surface until it feels elastic but not sticky. Wrap the dough in plastic wrap and refrigerate it for 30 minutes. This resting period allows the gluten to relax, making the dough easier to roll out later.
While the dough chills, prepare the butter. Cut it into small pieces and place them between two sheets of parchment paper. Roll it out evenly to about 3mm thick. This step ensures the butter will incorporate smoothly into the dough, creating those signature flaky layers.
Rolling and Layering for Flakiness
Now comes the fun part—layering the butter into the dough. There are two popular methods for this: the "spread" method and the "lock-in" method. I prefer the lock-in method because it creates a more structured dough, similar to puff pastry. Here’s how to do it:
Roll the chilled dough into a rectangle slightly larger than your butter sheet.
Place the butter on one half of the dough, leaving a small border around the edges.
Fold the other half of the dough over the butter, sealing the edges gently with your fingers.
Roll the dough out again into a long rectangle. Fold it into thirds, like folding a letter. This is your first "turn."
Wrap the dough in plastic wrap and refrigerate it for 30 minutes.
Repeat this process two more times. Each turn creates more layers, which will puff up beautifully when baked. Keep the dough cold throughout to prevent the butter from melting into the dough.
Tips for Chilling and Shaping the Dough
Chilling is crucial for achieving a flaky tart crust. Always refrigerate the dough between turns to keep the butter firm. If the butter softens too much, it can seep out, ruining the layers. Use a light touch when rolling to avoid tearing the dough.
Once you’ve completed the turns, roll the dough into a thin rectangle, about 3mm thick. Starting from the shorter side, roll it tightly into a log. This step ensures even layers in the final pastry. Wrap the log in plastic wrap and chill it for at least 30 minutes before cutting and shaping.
When ready to shape, slice the dough log into 2cm-thick rounds. Press each round into a tart mold, working the dough up the sides to form a shell. Aim for a uniform thickness to ensure even baking. Freeze the shells for 10 minutes before filling them with custard. This extra chill time helps the dough hold its shape during baking.
By following these steps, you’ll create a pastry that’s crisp, buttery, and irresistibly flaky. It’s the perfect base for your pastel de nata.
How to Make the Custard Filling for Portuguese Egg Tarts
The custard filling is the soul of pastel de nata. It’s creamy, smooth, and perfectly sweetened, with just the right balance of richness. Let’s walk through how to create this luscious filling step by step.
Mixing the Ingredients for a Smooth Custard
Start by gathering your ingredients. Combine the whole egg, egg yolks, sugar, whipping cream, and milk in a mixing bowl. I like to use a whisk to blend everything together. This ensures the sugar dissolves completely and the mixture becomes silky. If you notice any lumps, keep whisking until the texture smooths out.
Patience is key here. Rushing through this step can leave you with unevenly mixed ingredients, which might affect the final texture of your custard. Once everything looks well-combined, cover the bowl with plastic wrap and refrigerate it for about 30 minutes. This resting time allows the sugar to fully dissolve, giving you a smoother custard later.
Pro Tip: Use room-temperature eggs and dairy. Cold ingredients can make it harder to achieve a uniform mixture.
Flavor Enhancements: Vanilla, Lemon Zest, and Cinnamon
Once the custard reaches the perfect consistency, it’s time to add some flavor. A splash of vanilla extract works wonders, adding warmth and depth. For a zesty twist, grate a bit of lemon zest into the mixture. If you enjoy a hint of spice, sprinkle in a pinch of cinnamon. These additions elevate the custard filling, making it even more irresistible.
Fun Fact: Traditional pastéis de nata often feature a touch of cinnamon, which pairs beautifully with the caramelized top of the tarts.
By following these steps, you’ll create a custard filling that’s rich, creamy, and full of flavor. It’s the perfect complement to the flaky pastry crust, bringing your egg custard tarts to life.
How to Assemble and Bake Pastel de Nata
Now that the pastry and custard are ready, it’s time to bring everything together. This step is where the magic happens. Assembling and baking pastel de nata requires precision, but the results are worth every effort. Let’s get started.
Shaping the Tart Shells
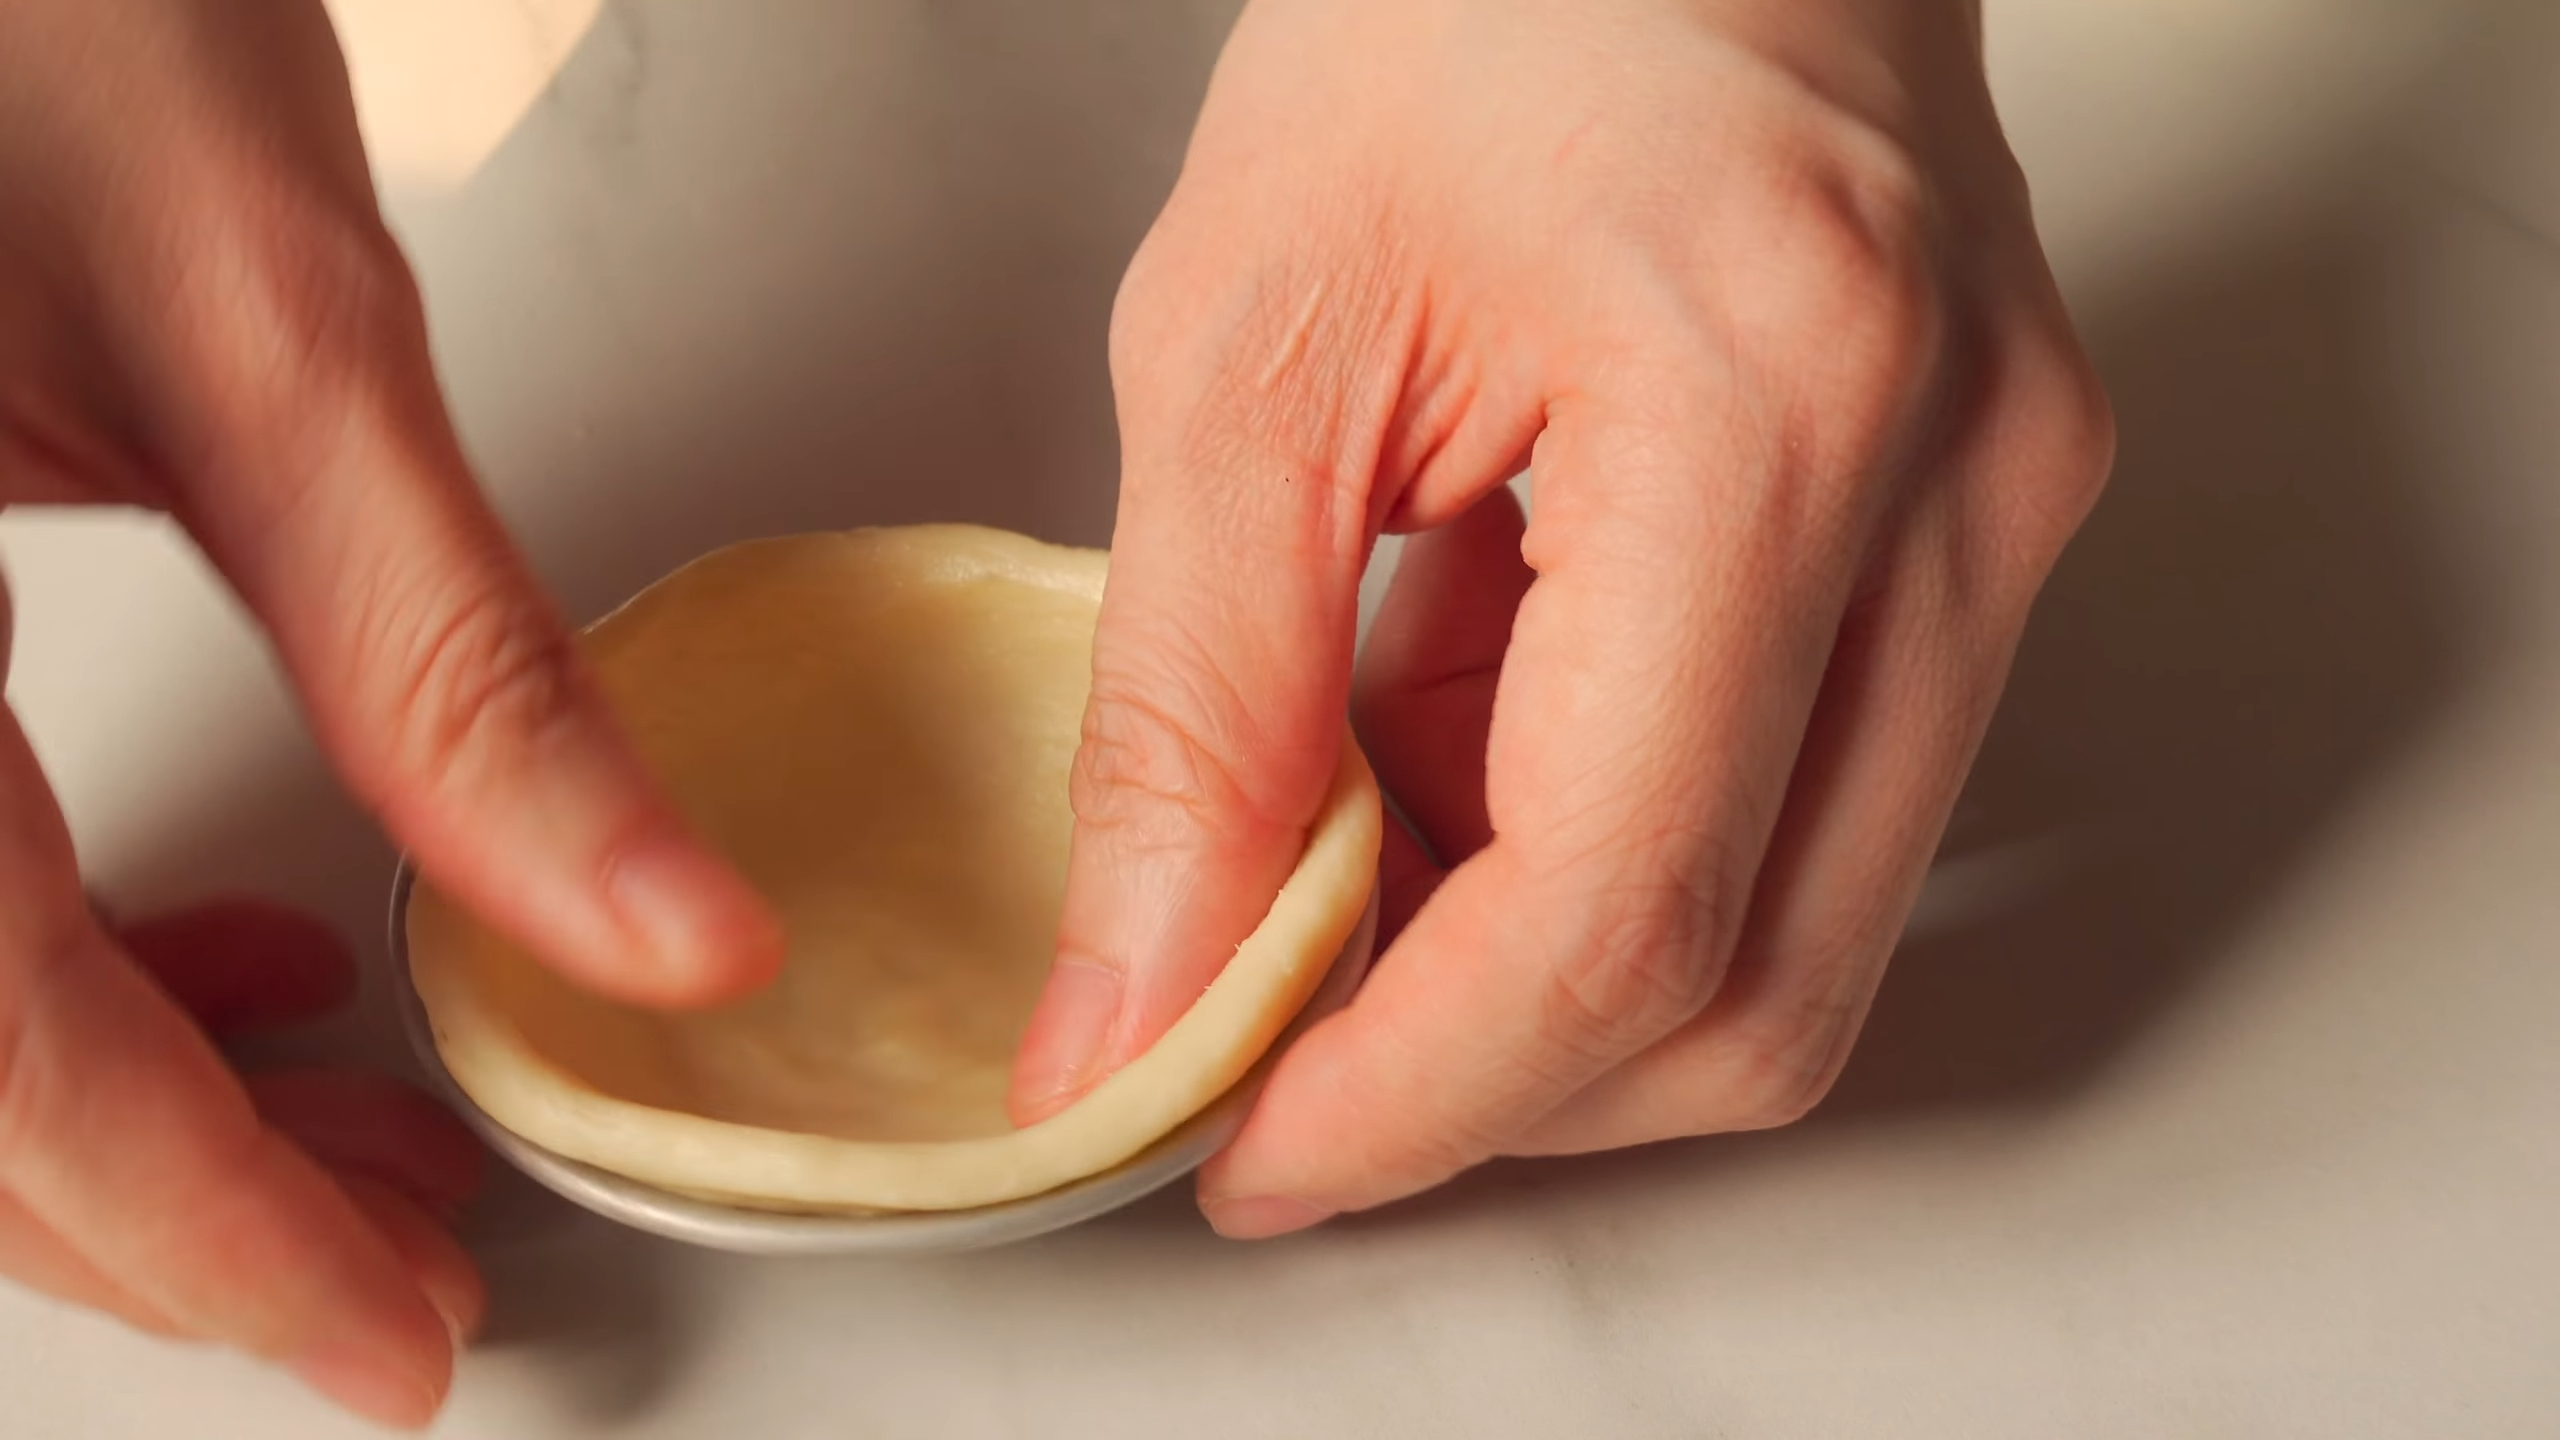
Shaping the tart shells is a hands-on process that sets the foundation for your egg custard tarts. Start by taking the chilled dough log out of the refrigerator. Use a sharp knife to slice it into 2cm-thick rounds. You should end up with about 12 pieces, depending on the size of your dough.
Take one round and place it in the center of a tart mold. Use your thumb to press the dough down and outward, working it up the sides of the mold. Rotate the mold as you press to ensure an even thickness. The dough should extend about 1cm above the edge of the mold. Repeat this process for all the rounds.
Pro Tip: If the dough feels too firm, let it sit at room temperature for a few minutes. This makes it easier to shape without cracking.
Once shaped, freeze the tart shells for 10 minutes. This quick chill helps the dough hold its structure during baking, ensuring those beautiful, flaky layers stay intact.
Filling the Shells with Custard
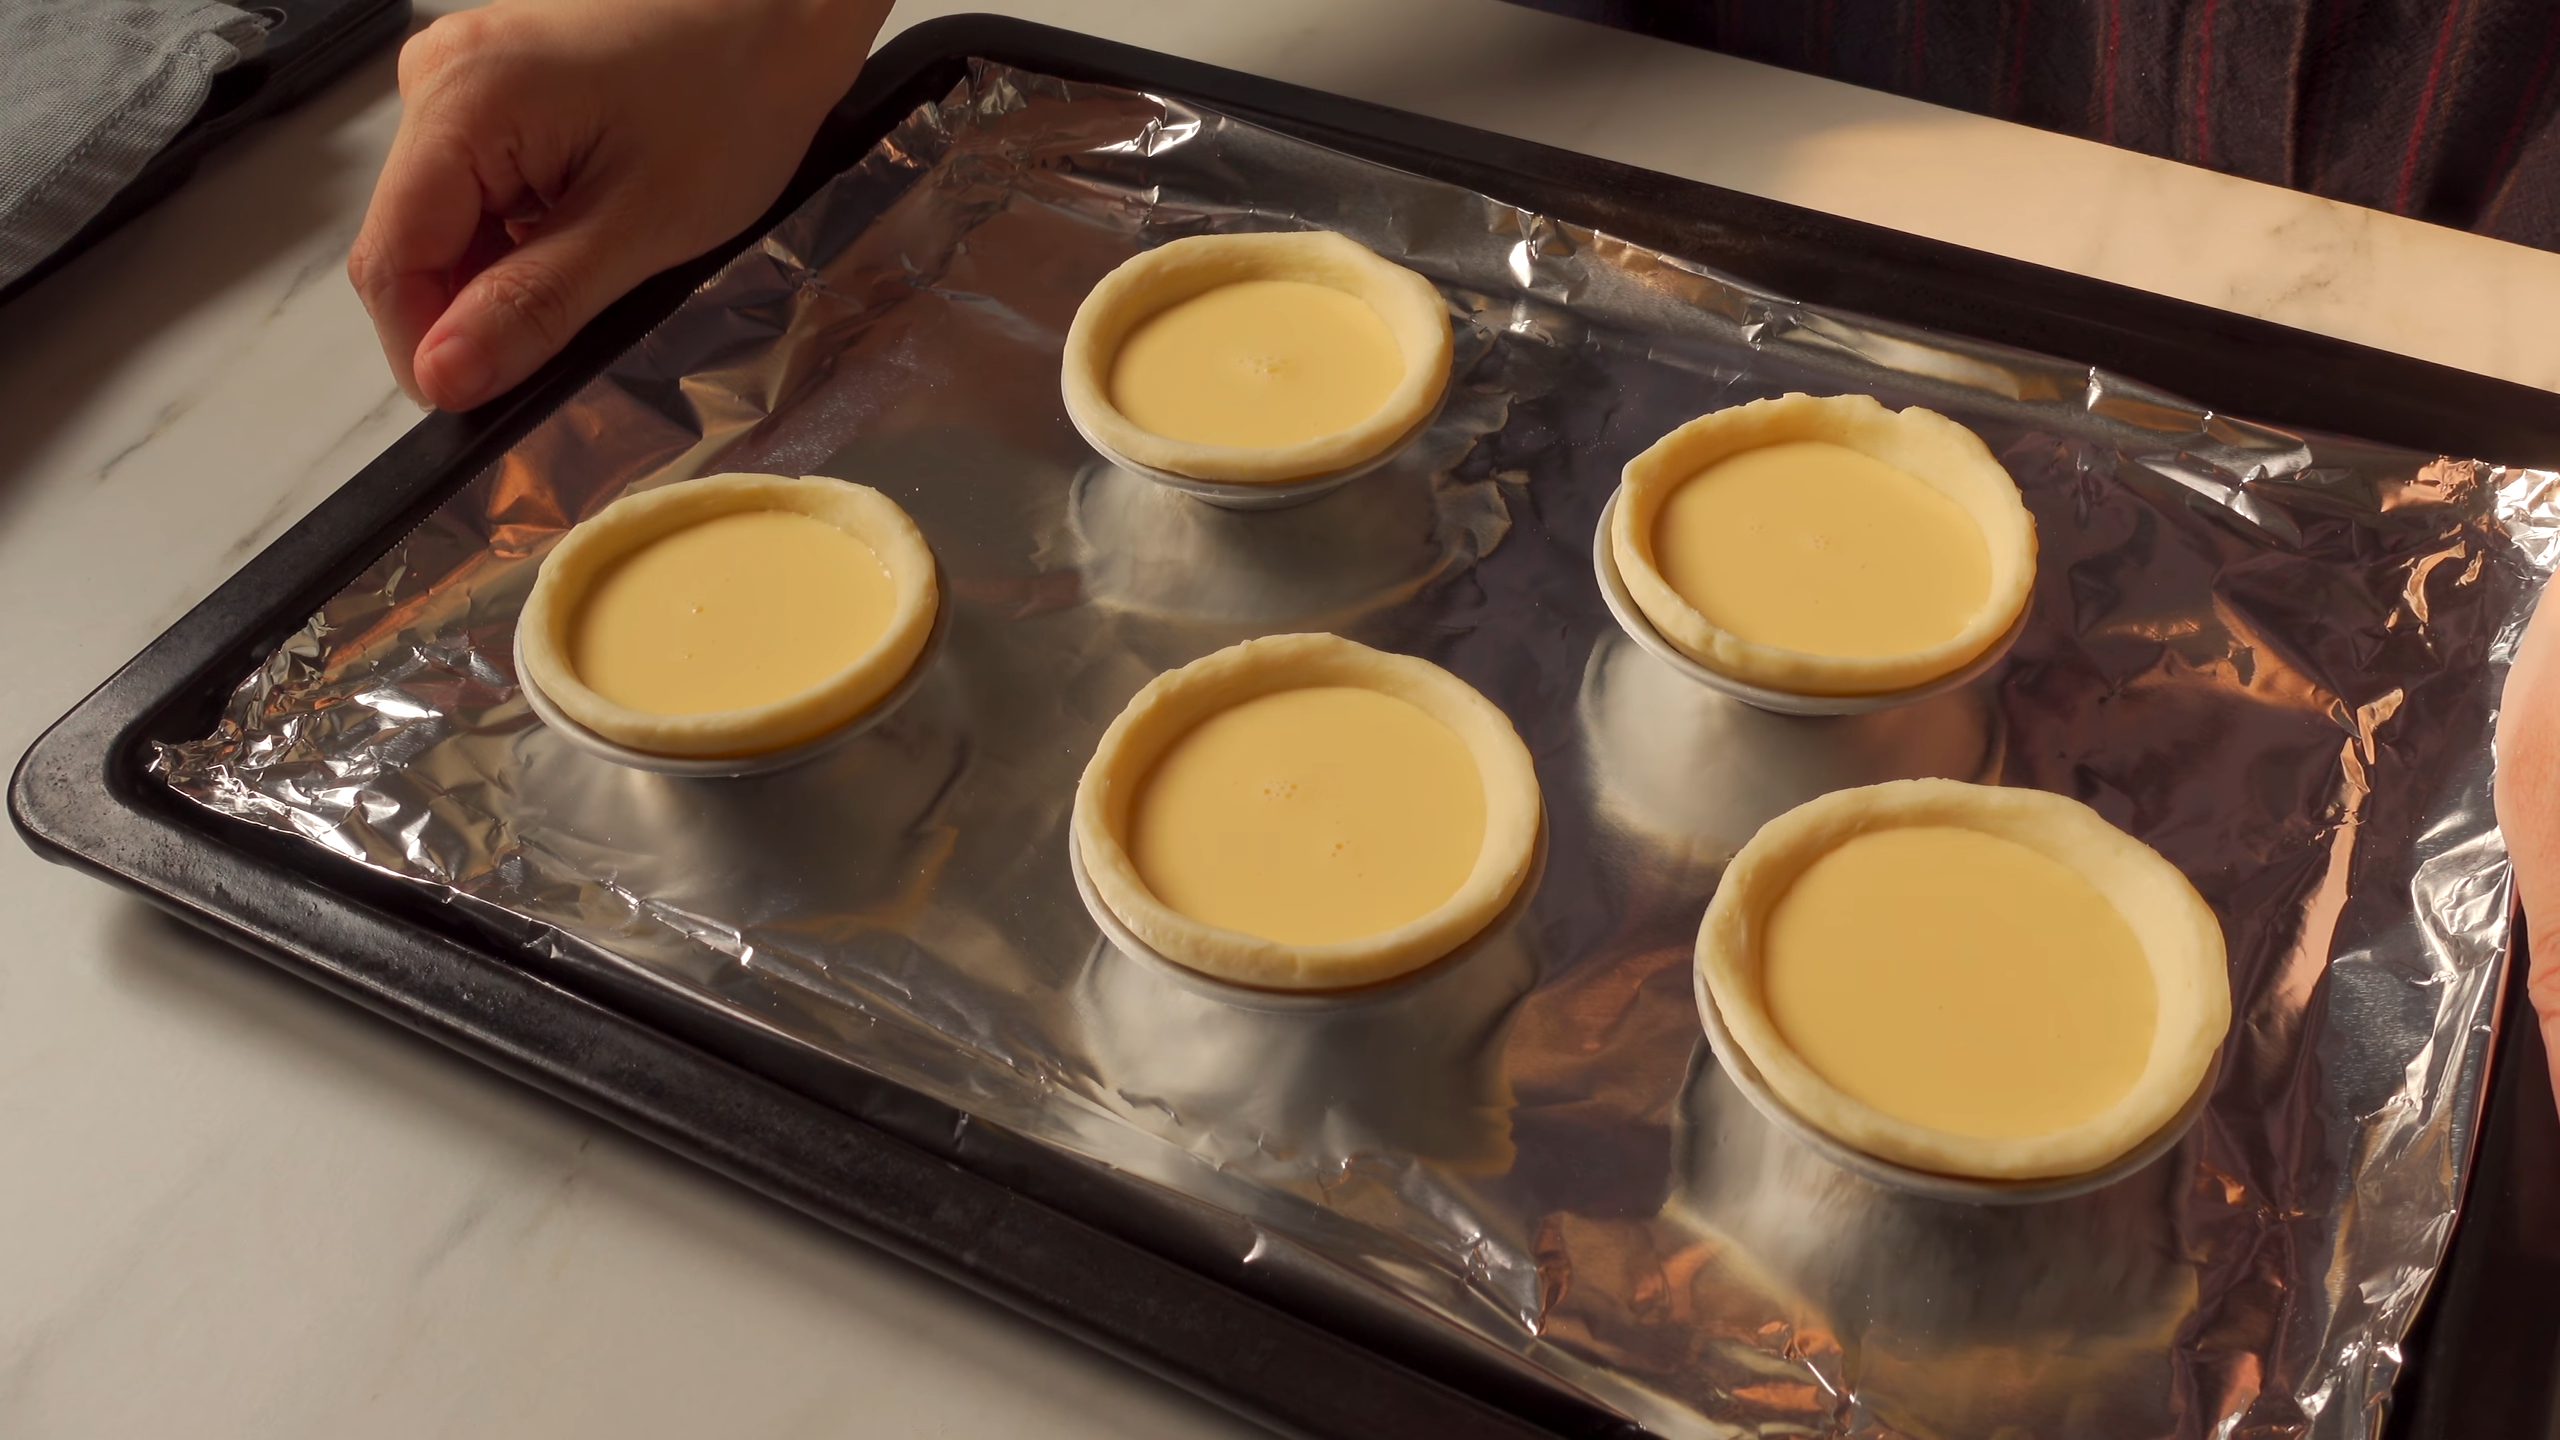
After shaping the shells, it’s time to fill them with the creamy custard. Take the prepared custard out of the refrigerator and give it a quick stir to ensure it’s smooth. Pour the custard into each tart shell, filling them about 80% full. Avoid overfilling, as the custard will puff up slightly during baking.
Quick Tip: Use a small ladle or measuring cup with a spout for precise pouring. This minimizes spills and keeps the edges of the shells clean.
If you’re adding a personal touch, now’s the time. Sprinkle a pinch of cinnamon or a tiny zest of lemon over the custard for added flavor. These little details can elevate your pastel de nata to the next level.
Baking Tips for the Perfect Caramelized Top
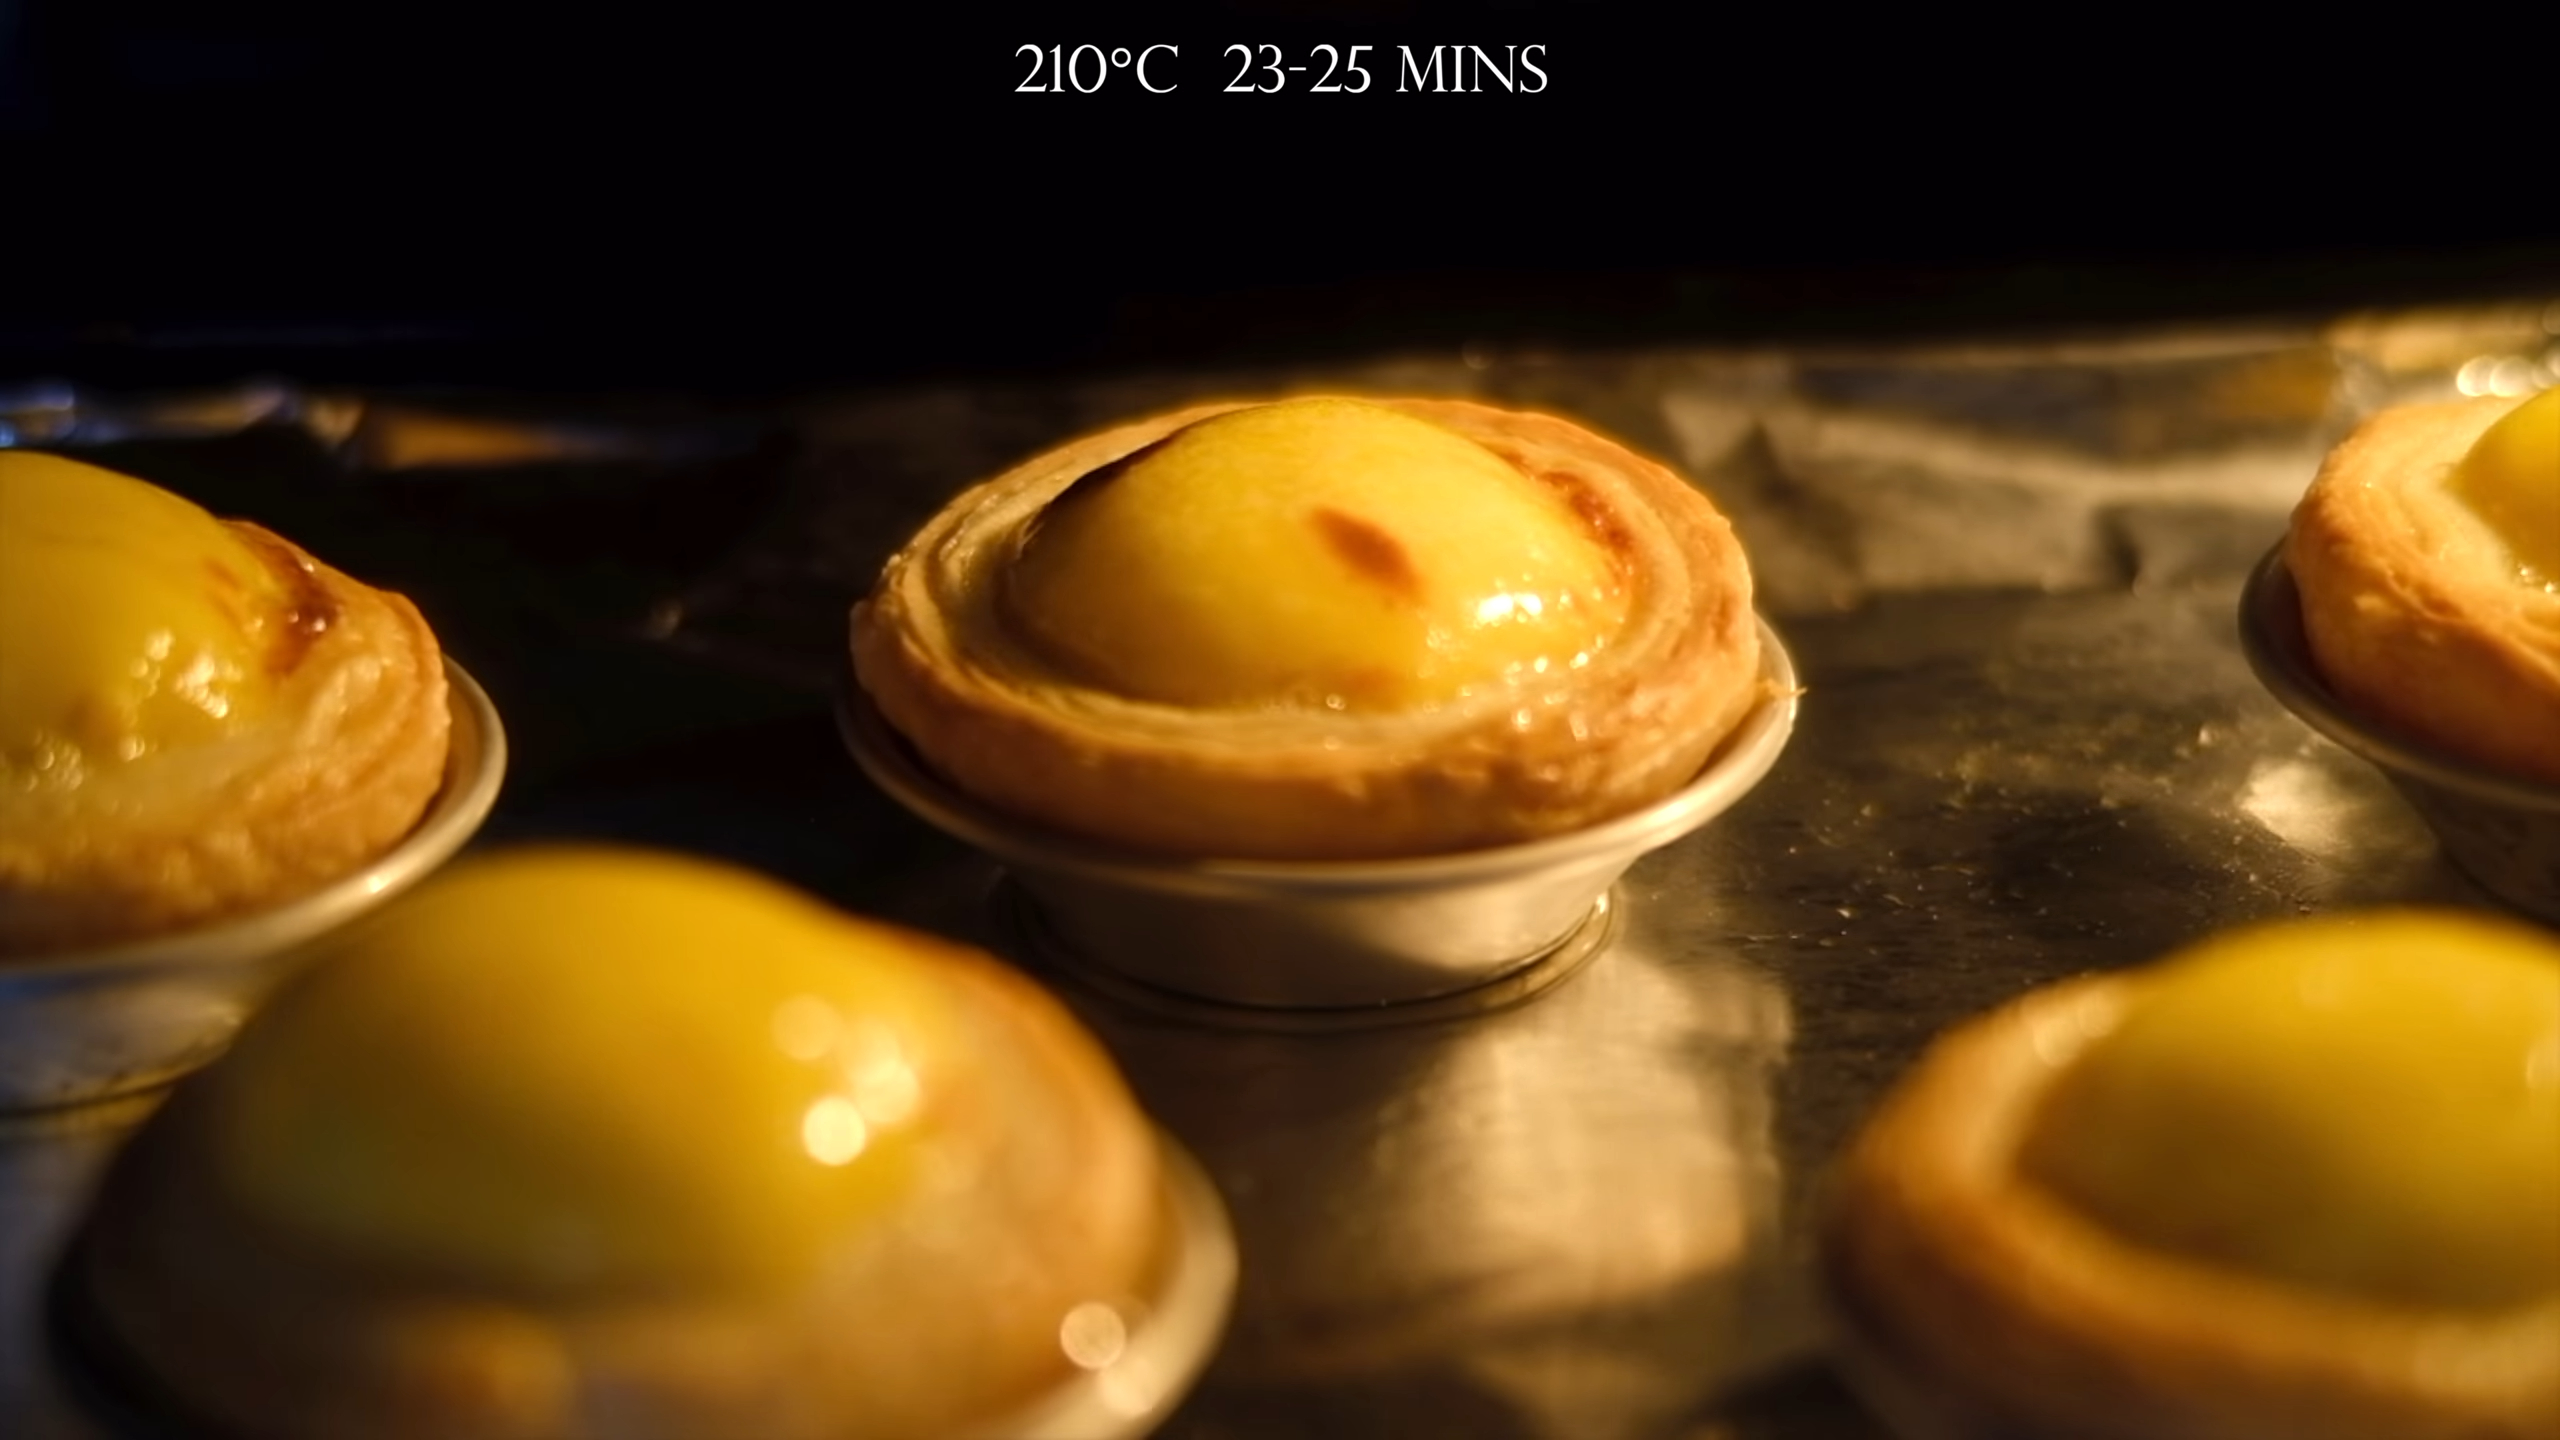
Baking is where the transformation happens. Preheat your oven to 210°C (410°F). Place the filled tart molds on a baking sheet lined with foil. The foil not only catches any spills but also reflects heat, helping the tarts bake evenly.
Bake the tarts on the middle rack for 23-25 minutes. Keep an eye on them during the last few minutes. The custard should develop a golden, caramelized top with tiny dark spots. This is the hallmark of a well-baked pastel de nata. The pastry edges should look crisp and golden.
Important Reminder: High heat is essential for achieving the signature caramelized top. Don’t lower the temperature, even if it feels too hot.
Once baked, remove the tarts from the oven and let them cool in the molds for a few minutes. Carefully transfer them to a wire rack to cool completely. The cooling process allows the custard to set and the pastry to firm up, making them easier to handle.
Fun Fact: Traditional Portuguese bakeries often bake these tarts in ovens that reach up to 300°C (572°F). While home ovens can’t match that, baking at 210°C (410°F) still delivers excellent results.
By following these steps, you’ll create pastel de nata with a flaky crust, creamy filling, and perfectly caramelized top. Serve them warm for the ultimate experience, and watch as they disappear in no time.
Tips for Serving and Storing Portuguese Custard Tarts
Serving and storing Portuguese egg tarts properly ensures you enjoy their full flavor and texture. Let me share some tips to help you make the most of these delightful treats.
Best Ways to Serve Pastel de Nata
Freshly baked Portuguese egg tartsP taste the best. Serve them warm, straight from the oven, when the custard is creamy, and the pastry is crisp. If you want to elevate the experience, sprinkle a light dusting of powdered sugar or cinnamon on top. This simple addition enhances the flavor and gives them a traditional touch.
For a more authentic presentation, pair the tarts with a cup of strong espresso or black tea. The rich custard and flaky crust balance beautifully with the bold flavors of coffee or tea. If you’re hosting guests, arrange the tarts on a decorative platter. Their golden tops and delicate layers make them a stunning centerpiece.
Fun Fact: In Portugal, locals often enjoy pastéis de nata as a mid-morning snack or dessert after lunch. It’s a tradition that has spread to many parts of the world.
How to Store and Reheat Portuguese Egg Tarts
If you have leftovers (though they rarely last long), store them properly to maintain their quality. Place the tarts in an airtight container and keep them in the refrigerator. They’ll stay fresh for up to three days. Avoid stacking them to prevent the delicate pastry from getting crushed.
When you’re ready to enjoy them again, reheating is key. Preheat your oven to 180°C (350°F). Place the tarts on a baking sheet and warm them for about 5-7 minutes. This method revives the crispness of the pastry while keeping the custard creamy. Avoid using a microwave, as it can make the crust soggy.
Pro Tip: If you’re short on time, a toaster oven works well for reheating. It heats the tarts evenly without compromising their texture.
Common Mistakes to Avoid When Serving

To fully appreciate egg custard tarts, avoid these common pitfalls:
Serving them cold: Cold tarts lose their flaky texture and creamy consistency. Always serve them warm for the best experience.
Overheating during reheating: Too much heat can dry out the custard or burn the pastry. Stick to moderate temperatures and short reheating times.
Skipping the garnish: A sprinkle of cinnamon or powdered sugar adds a layer of flavor. Don’t miss this simple step.
Improper storage: Leaving the tarts uncovered in the fridge can make the pastry stale. Always use an airtight container.
By following these tips, you’ll ensure your Portuguese custard tarts remain as delicious as when they first came out of the oven. Whether you’re serving them to guests or enjoying them solo, these small details make a big difference.
Making pastel de nata at home is a rewarding experience. From crafting the flaky pastry to perfecting the creamy custard, each step brings you closer to enjoying this iconic Portuguese egg tart. I encourage you to give this recipe a try and share your results. There’s nothing quite like the joy of pulling these golden tarts from the oven and savoring their warm, caramelized tops. Whether you’re recreating memories of Portugal or discovering them for the first time, these tarts are sure to delight.
Frequently Asked Questions



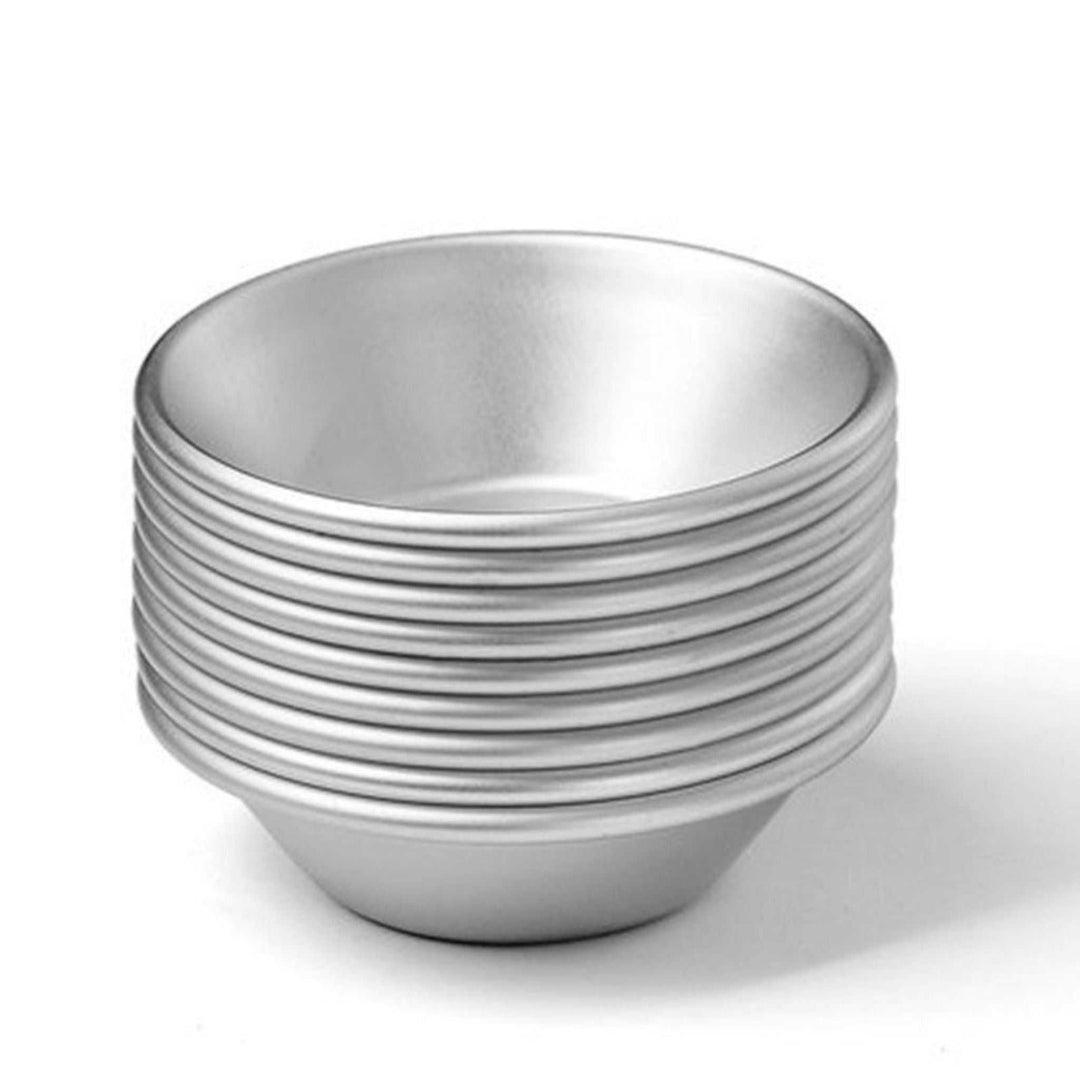









Da tempo cerco gli stampini giusti. Ho letto diverse ricette tipiche di Lisbona. Lo stampo deve avere queste misure: diametro alla base 6cm in alto 9cm H 2cm. Ho visto che i vostri stampini da Pasteis de nata, purtroppo sono più piccoli. Non potreste procurarli, sono molto interessata, perché, vorrei fare i Pasteis. Grazie, cari saluti Lina Marangon.
Leave a comment