최고의 일본식 핫 크로스 수플레 치즈케이크

2024년 12월 27일

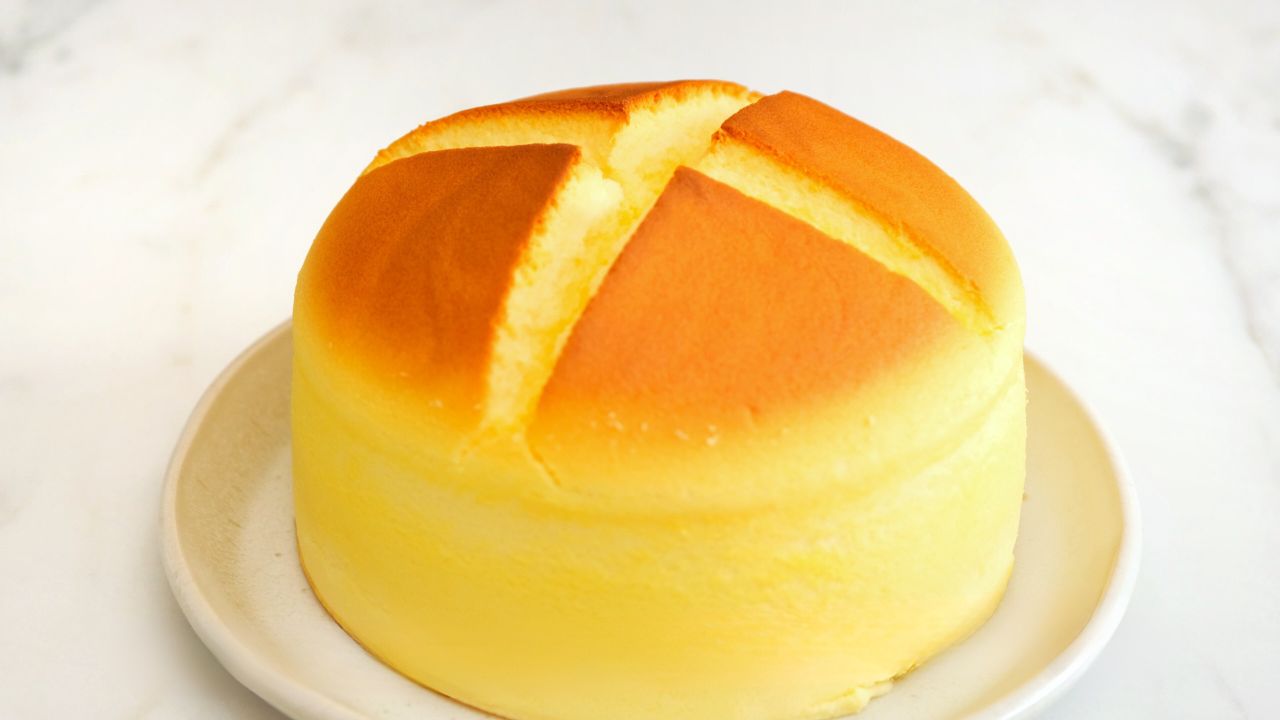
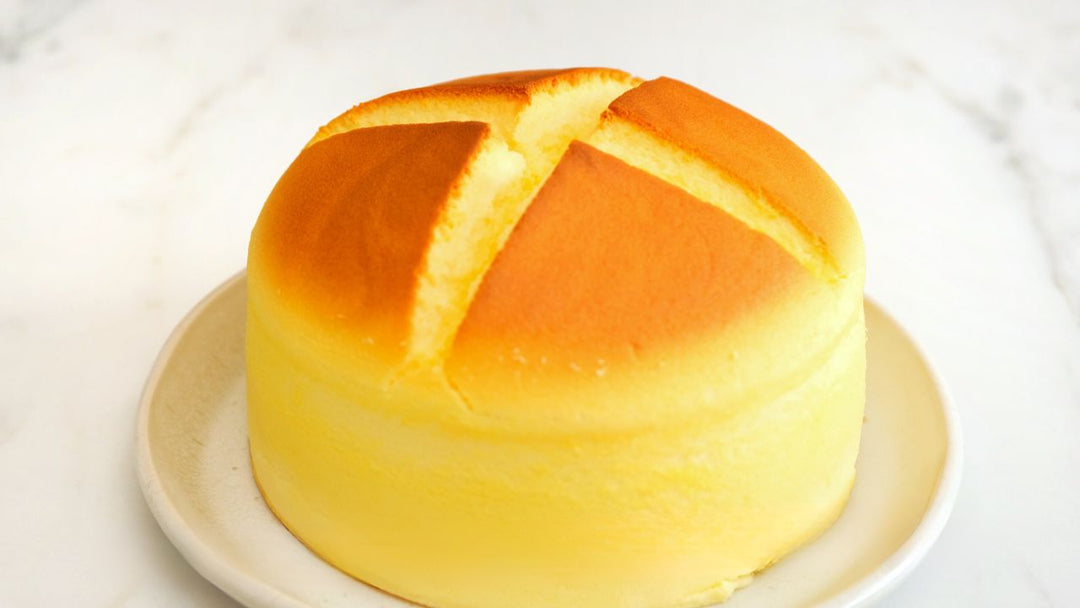
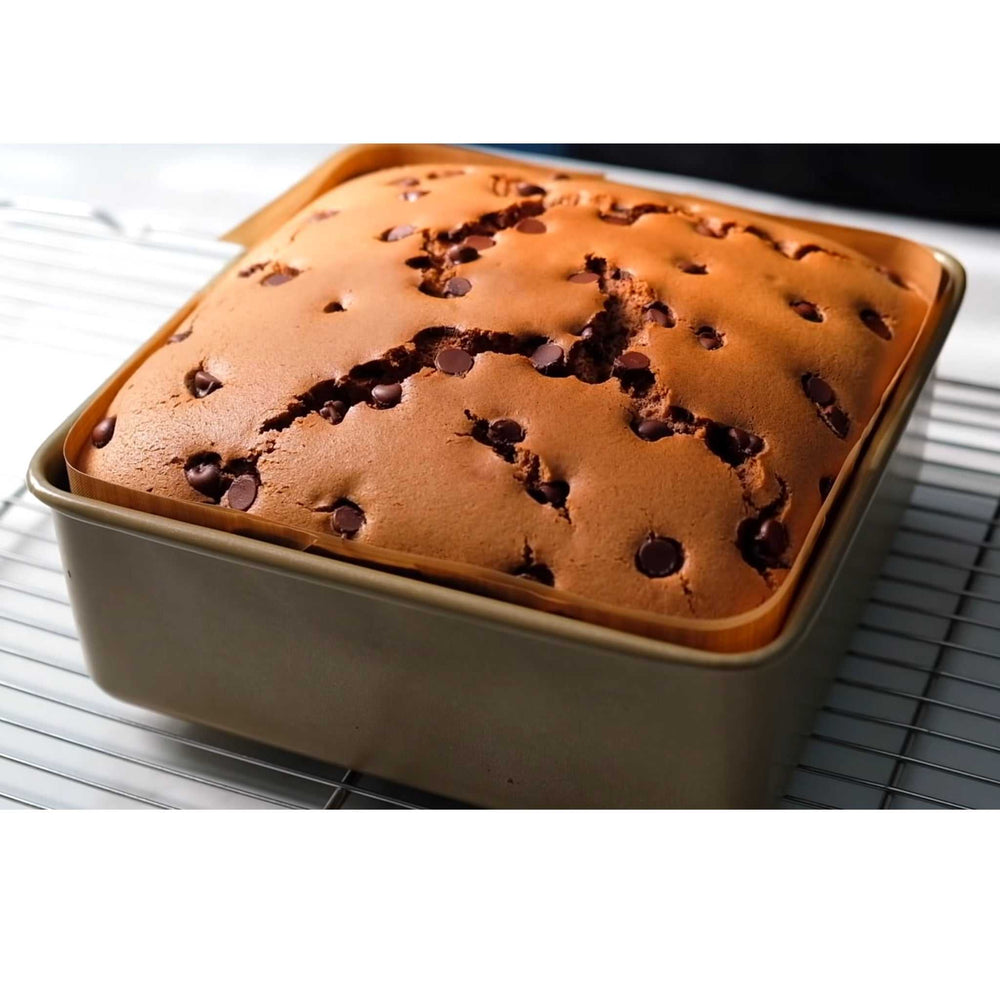
Japanese soufflé cheesecake is known for its light, fluffy texture, achieved by incorporating whipped egg whites into the batter. The unique hot cross design not only enhances the cake's appearance but also helps it bake evenly and rise beautifully.

Table of Contents

    📖RECIPE

    최고의 핫 크로스 일본식 수플레 치즈케이크!!

    ★★★★★ 5 from 5 reviews
    최고의 핫 크로스 일본식 수플레 치즈케이크!!
    Author: 몰랄라쿡
    Prep Time: 30분
    Cook Time: 2시간
    Total Time: 2시간 30분
    Yield:
    Category:
    Method:
    Cuisine: 케이크

    INGREDIENTS

    Units:
    SCALE:
    Cook Mode (prevent your screen from going dark)

    INSTRUCTIONS

    1. 내열용기에 크림치즈, 무염버터, 우유를 넣어주세요.
    2. 약한 불로 끓는 물 위에 그릇을 놓습니다. 부드러워질 때까지 저어준 다음 불을 끄고 살짝 식힙니다.
    3. 달걀 노른자를 한 번에 하나씩 추가하고, 추가할 때마다 잘 섞습니다.
    4. 케이크 가루와 옥수수 전분을 혼합물에 체로 치십시오. 부드러워질 때까지 저어줍니다.
    5. 부드러운 질감을 위해 반죽을 고운 메쉬 체에 걸러냅니다.
    6. 깨끗한 그릇에 달걀 흰자에 레몬즙과 소금을 넣고 거품이 날 때까지 치세요.
    7. 부드러운 봉우리가 형성될 때까지 휘핑하면서 점차적으로 설탕을 추가합니다.
    8. 달걀 흰자의 3분의 1을 반죽에 넣어 반죽을 가볍게 만듭니다.
    9. 완전히 섞일 때까지 나머지 달걀 흰자를 두 번 추가하여 부드럽게 접습니다.
    10. 6인치 원형 팬에 양피지를 깔고 외부를 호일로 감쌉니다.
    11. 팬에 반죽을 붓고 가볍게 두드려서 기포를 빼주세요.
    12. 팬을 수조에 넣고 측면의 절반 정도를 채웁니다.
    13. 상단 온도 180°C/356°F, 하단 온도 110°C/230°F에서 15-20분 동안 굽습니다. 그런 다음 날카로운 칼을 사용하여 표면에 십자가를 표시합니다.
    14. 윗불 180°C/356°F, 아랫불 110°C/230°F에서 10~15분 동안 구워 표면을 굳힙니다.
    15. 온도를 윗불 150°C / 302°F, 아랫불 110°C / 230°F로 낮추고 60-70분 동안 굽습니다.
    16. 오븐과 수조에서 케이크를 꺼냅니다. 호일을 풀고 와이어 랙에서 식힙니다.

    Step-by-Step Japanese Hot Cross Soufflé Cheesecake

    Preparing the Batter: Mixing Cream Cheese, Butter, and Milk

    This step sets the foundation for the cheesecake’s creamy texture. Follow these steps carefully:

    1. Place the cream cheese, unsalted butter, and whole milk in a heatproof bowl.

    2. Set the bowl over a pot of simmering water. Stir gently as the ingredients melt together. The heat should be low to avoid curdling.

    3. Once the mixture becomes smooth and silky, remove it from the heat. Let it cool slightly.

    1. After cooling, add the egg yolks one at a time. Mix well after each addition.

    2. Sift the cake flour and cornstarch into the mixture. Stir until the batter is smooth and free of lumps.

    3. Strain the batter through a fine mesh sieve. This ensures a silky texture and removes any remaining lumps.

    This method creates a base that’s rich yet light, setting the stage for the airy texture of the soufflé.

    Whipping the Egg Whites: Achieving Soft Peaks

    Whipping egg whites is the secret to achieving that signature light and airy texture in a Japanese soufflé cheesecake. I always start with cold temperature egg whites because they whip up faster and hold their structure better. Here’s how I do it:

    1. Place the egg whites in a clean, dry mixing bowl. Any grease or residue can prevent the whites from whipping properly.

    2. Add a small amount of lemon juice and a pinch of salt. These help stabilize the egg whites and create a firmer foam.

    3. Use a hand mixer or stand mixer on medium speed to beat the egg whites until they become frothy.

    4. Gradually add the sugar in small increments. This step ensures the sugar dissolves completely, giving the meringue a smooth texture.

    5. Increase the mixer speed to high and continue whipping until soft peaks form. You’ll know you’ve reached the right consistency when the peaks gently fold over when you lift the whisk.

    Preparing the Pan and Water Bath

    Proper preparation of the pan and water bath ensures a smooth, crack-free cheesecake. Here’s how I set it up:

    1. Line a 6-inch round cake pan with thick parchment paper. Cut the paper to fit the bottom and sides snugly. This prevents creases on the cake’s surface.

    2. Wrap the outside of the pan with aluminum foil. This step keeps water from seeping into the pan during baking.

    3. Pour the batter into the prepared pan. Tap the pan gently on the counter to release any large air bubbles.

    4. Place the pan in a larger baking tray. Fill the tray with hot water until it reaches halfway up the sides of the cake pan. This water bath creates steam, which keeps the cheesecake moist and prevents cracks.

    Baking the Cheesecake: Temperature and Timing

    Baking the cheesecake requires precision. I always preheat my oven to ensure even heat distribution. For this recipe, set the upper heat to 356°F (180°C) and the lower heat to 230°F (110°C). This dual-temperature method helps the cheesecake rise slowly and evenly without cracking.

    Here’s how I bake it step by step:

    1. Place the prepared cake pan with the water bath into the oven. Position it on the middle rack for the best results.

    2. Bake for upper heat to 356°F (180°C) and the lower heat to 230°F (110°C) 15-20 minutes at the initial temperature. During this time, the surface will set and form a light skin. 

    3. Use a sharp knife to score a cross on the surface. Gently press the knife into the surface without cutting too deep. The goal is to guide the rise, not split the cake entirely.
    4. Bake for upper heat to 356°F (180°C) and the lower heat to 230°F (110°C) 10-15 minutes until golden color on the surface.
    5. Reduce the upper heat to 302°F (150°C) while keeping the lower heat at 230°F (110°C). Continue baking for another 60-70 minutes. This gradual reduction ensures the cheesecake cooks through without browning too quickly.

    Pro Tip: Avoid opening the oven door during baking. Sudden temperature changes can cause the cheesecake to deflate. Use the oven light to check progress instead.

    Cooling and Serving: Ensuring the Perfect Finish

    Cooling the cheesecake properly is just as important as baking it. After removing it from the oven, let it cool in the pan for about 15 minutes. This allows the structure to set and makes it easier to handle.

    Here’s my cooling process:

    1. Carefully lift the cheesecake out of the water bath. Remove the foil wrapping to prevent condensation from making the bottom soggy.

    2. Peel away the parchment paper gently. If you used thicker parchment, this step should be easy.

    3. Transfer the cheesecake to a wire rack. Let it cool completely at room temperature.

    Pro Tip: Avoid placing the cheesecake in the fridge while it’s still warm. Sudden temperature changes can cause the texture to become dense.

    Once cooled, you can serve it warm for a fluffy texture or chill it in the fridge for a creamier consistency. I love pairing it with fresh fruit or a drizzle of honey. The light sweetness and creamy flavor make it a versatile dessert for any occasion.


    Tips for Making Japanese Cotton Cheesecake

    Measuring Ingredients Correctly

    Measuring ingredients the right way is very important. I suggest using a kitchen scale for exact amounts. Measuring cups can work, but scales are more accurate. Even small changes in ingredients can affect the cheesecake. For example, too much flour makes it heavy, and too little sugar changes the sweetness.

    Quick Tip: Sift cake flour and cornstarch before measuring. This removes lumps and makes the batter smooth.

    Folding the Batter Gently

    Folding the batter carefully keeps the cheesecake soft and airy. This step needs patience and a gentle hand. First, I mix a little whipped egg white into the batter. This makes it lighter and easier to fold the rest. Using a spatula, I scoop from the bottom and fold over the top. I keep folding until no egg white streaks are left. Over-mixing can ruin the batter, so I stop as soon as it looks smooth.

    Quick Tip: Use a wide spatula for folding. It mixes well without breaking air bubbles.

    Adjusting Baking Time for Your Oven

    Every oven behaves differently, so adjusting the baking time is crucial for perfect results. I’ve learned a few tricks to adapt to my oven’s quirks.

    1. Know Your Oven’s Temperature
      I always use an oven thermometer to check if my oven runs hot or cold. Built-in oven settings aren’t always accurate. If the temperature is off, I adjust it accordingly. For example, if my oven runs hotter, I lower the temperature slightly to avoid overbaking.

    2. Check for Doneness Early
      I start checking the cheesecake about 5-10 minutes before the recommended baking time ends. I gently jiggle the pan to see if the center wobbles slightly. A slight wobble means it’s done. If the entire cake jiggles, it needs more time.

    3. Use Visual Cues
      I look for a light golden color on the surface. The edges should look set, but the center should still appear soft. These visual cues help me decide if the cheesecake is ready.

    4. Adjust for Altitude or Pan Size
      If I bake at a higher altitude, I extend the baking time slightly. Thin air affects how cakes rise and bake. Similarly, if I use a different pan size, I adjust the time. A larger pan needs less time, while a smaller pan takes longer.

    Pro Tip: Keep a baking journal. I jot down the exact time and temperature that work best for my oven. This helps me replicate perfect results every time.

    FAQ

    Why did my cheesecake crack on top?

    Cracks usually happen when the cheesecake dries out or bakes unevenly. I always use a water bath to prevent this. The steam keeps the oven humid and ensures even baking. If you notice the water in the bath evaporating, don’t open the oven door to refill it. Instead, keep an eye on the timer and remove the cheesecake as soon as the center sets. Opening the oven door too early can cause sudden temperature changes, which might lead to cracks.

    Quick Tip: Scoring the hot cross design before the second bake helps guide the rise and prevents uneven cracking.

    How do I know when my cheesecake is done?

    I check for a slight jiggle in the center of the cheesecake. If the edges look set and the middle wobbles gently, it’s ready. Avoid overbaking, as this can make the texture dense. I also look for a light golden color on the surface. If you’re unsure, turn off the oven and leave the cheesecake inside with the door slightly open for 10 minutes. This step helps it finish cooking gently.

    Can I skip the water bath?

    I wouldn’t recommend skipping the water bath. It’s essential for keeping the cheesecake moist and preventing cracks. Without it, the cake might bake unevenly or dry out. If you’re worried about water leaking into the pan, wrap the bottom tightly with aluminum foil. Use two or three layers for extra protection. The water bath creates a gentle baking environment that’s key to achieving the perfect texture.

    Why did my cheesecake sink after baking?

    A sinking cheesecake often means the egg whites were over-whipped or folded too aggressively. Whip the egg whites to soft peaks only. This keeps the batter light and airy without losing structure. Sudden temperature changes can also cause sinking. Let the cheesecake cool gradually in the oven with the door slightly open for about 10 minutes before taking it out.

    Remember, even a slightly sunken cheesecake still tastes amazing!

    How do I prevent lumps in the batter?

    Lumps usually come from cold ingredients or unsifted dry ingredients. I always use room-temperature cream cheese, butter, and eggs. This helps them blend smoothly. Sifting the cake flour and cornstarch removes any clumps and makes the batter silky. If I still see lumps, I strain the batter through a fine mesh sieve before folding in the egg whites.

    Can I use a different pan size?

    Yes, but you’ll need to adjust the baking time. A larger pan will make the cheesecake thinner and bake faster. A smaller pan will make it thicker and take longer. I recommend sticking to a 6-inch pan for the best results. If you change the size, keep an eye on the cake and check for doneness earlier or later than the recipe suggests.

    Why is my cheesecake not fluffy?

    The fluffiness comes from properly whipped egg whites and gentle folding. If the egg whites weren’t whipped enough, the cake won’t rise as much. Over-mixing the batter can also deflate the air bubbles, making the cheesecake dense. Take your time folding the egg whites into the batter. Use a spatula and a light hand to keep the mixture airy.

    How should I store leftover cheesecake?

    I let the cheesecake cool completely before wrapping it tightly in plastic wrap or placing it in an airtight container. In the fridge, it stays fresh for up to three days. For longer storage, I freeze individual slices wrapped in plastic and stored in freezer bags. To enjoy later, thaw the slices in the fridge overnight. Reheat gently in the microwave or oven if you prefer it warm.

    Can I make this cheesecake ahead of time?

    Absolutely! This cheesecake tastes even better the next day. Bake it a day in advance and let it chill in the fridge overnight. The flavors develop, and the texture becomes creamier. Just make sure to store it properly to keep it fresh.

    What’s the best way to serve this cheesecake?

    You can serve it warm for a soft, fluffy texture or chilled for a creamy consistency. I love pairing it with fresh fruits like strawberries or blueberries. A drizzle of honey or a dollop of whipped cream adds a fancy touch. For drinks, green tea or coffee complements the light sweetness perfectly.

    Serving tip: Arrange fruit slices around the cheesecake for a beautiful presentation that’s sure to impress!


    판매
    Resistant Gloves High Temperature
    Resistant Gloves High Temperature
    전문 내열 장갑
    판매 가격 ₩20,000 정가 ₩27,000
    판매
    Stainless Steel Egg Beater
    Stainless Steel Egg Beater
    전문 스테인레스 스틸 거품기
    판매 가격 ₩12,000 정가 ₩15,000
    판매
    실리콘 주걱 세트 라이트 컬러 팔레트
    판매 가격 ₩30,000 정가 ₩45,000

    코멘트를 남겨주세요

    이 사이트는 hCaptcha에 의해 보호되며, hCaptcha의 개인 정보 보호 정책 서비스 약관 이 적용됩니다.


    Frequently Asked Questions