

Easy No Cream Cheese Soufflé Cheesecake
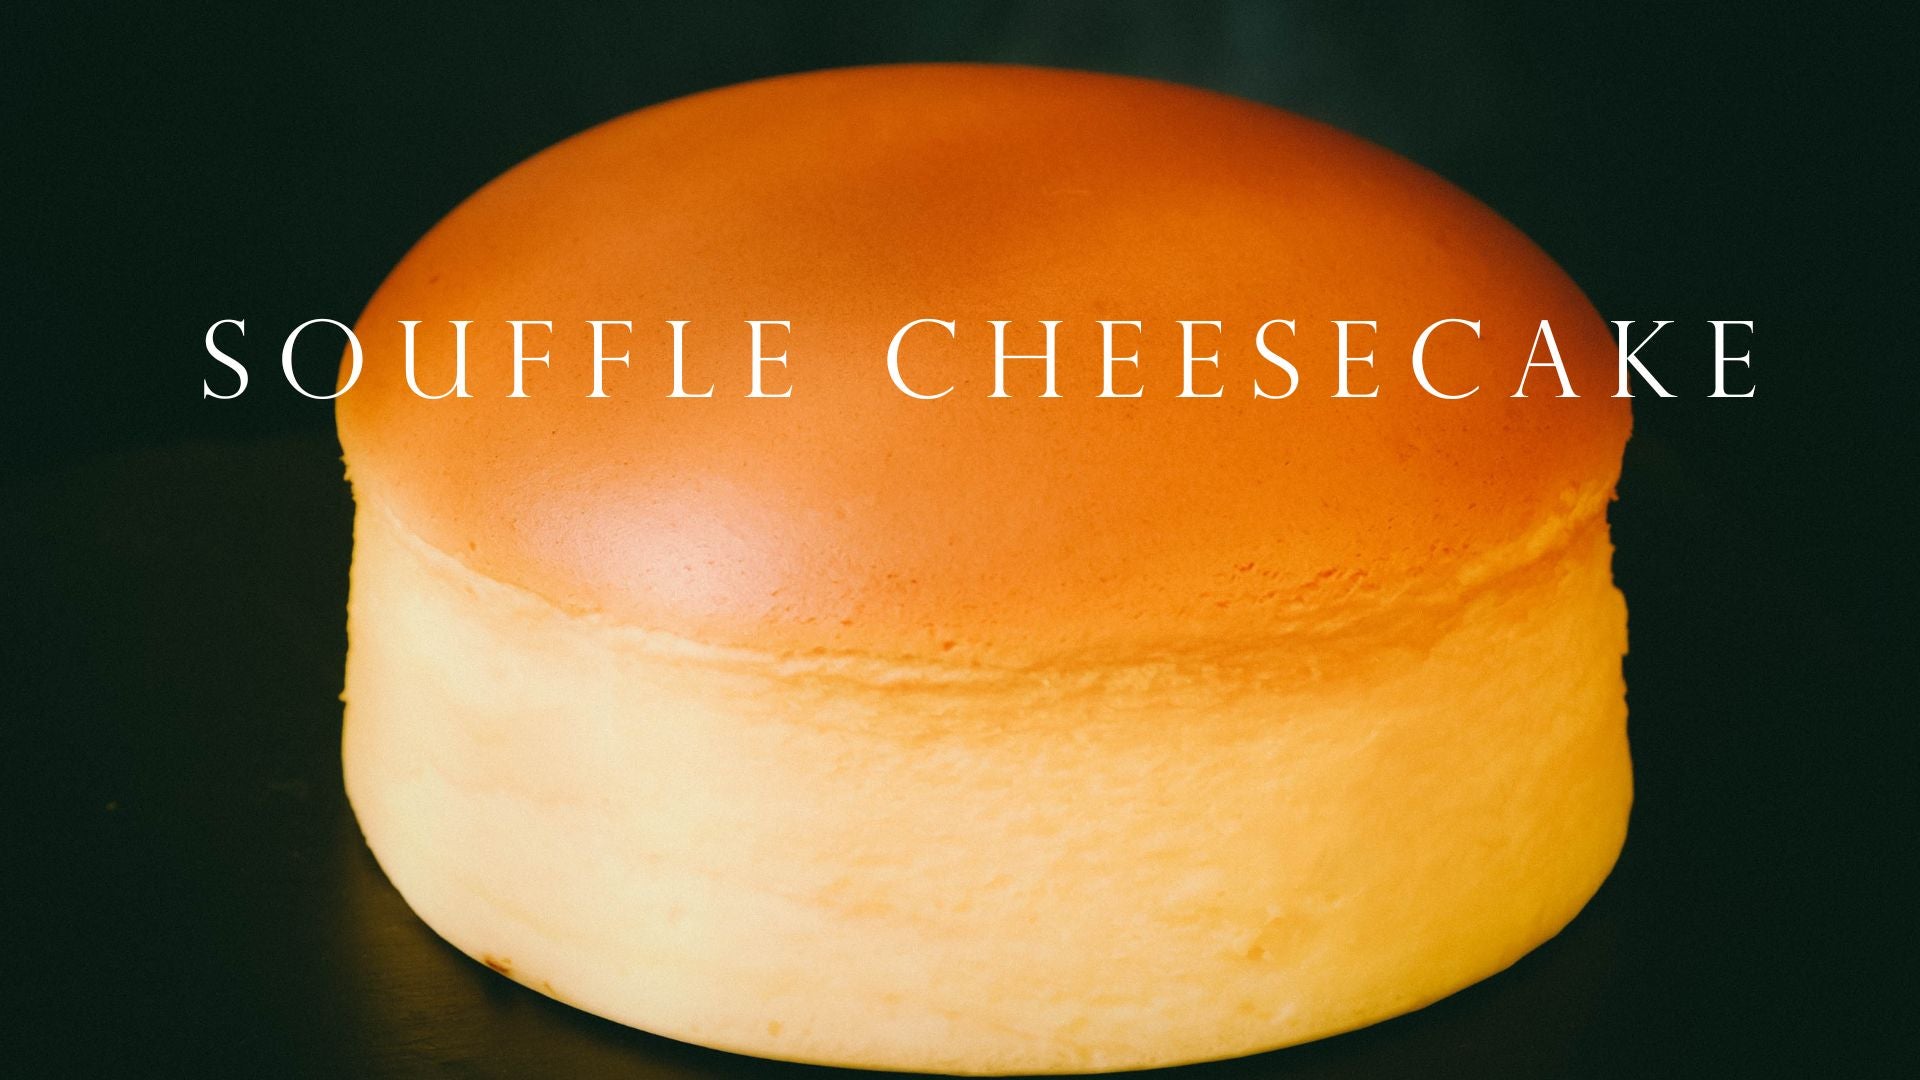
Table of Contents
Easy No-Cream-Cheese Soufflé Cheesecake
INGREDIENTS
INSTRUCTIONS
Today I’m excited to share a unique Japanese-style soufflé cheesecake recipe that’s ultra cheesy – without using any cream cheese! This No-Cream-Cheese Cheesecake uses a combo of real cheddar (or American cheese slices) and creamy Brie to create a fluffy, rich cheesecake with incredible flavor. If you’ve ever craved cheesecake but found yourself out of cream cheese, or you just want to try a fun twist on the classic, this recipe is for you. 😊
This cake has the light, airy texture of a Japanese cotton cheesecake (think jiggly souffle cheesecake) and a bold cheese flavor that’s surprisingly balanced. I was skeptical at first about using sliced cheese in a cheesecake, but after a few experiments I’m completely hooked. The cheddar adds a delightful richness and a slight savory note, the Brie brings creaminess, and the result is a melt-in-your-mouth cheesecake that’s just as good as (if not richer than) the cream cheese version. Plus, it’s a bit less heavy on the stomach, so you can easily go back for seconds!
Why You’ll Love This Cheesecake
· No Cream Cheese Needed: Skip the pricey cream cheese – this recipe uses common cheeses you might already have. It’s perfect for times when cream cheese is hard to find or you want to save a trip to the store.
· Ultra Cheesy Flavor: Made with sharp cheddar (or American cheese slices) and mild Brie, this cake packs double the cheese for a flavor that cheesecake lovers will adore. It’s rich and tangy, with a slight saltiness that balances the sweetness.
· Light and Fluffy Texture: Despite all that cheese, the cake stays incredibly light, soft, and airy – just like a classic Japanese soufflé cheesecake. It has a delicate crumb that almost sighs when you bite into it. No dense bricks here!
· Less Greasy, More Guilt-Free: Without cream cheese and with less butter, this cheesecake feels a touch lighter on the palate. You get all the creaminess and flavor without an overly heavy feeling.
· Fun & Unique Baking Project: If you love experimenting, this recipe is a refreshing twist on tradition. It’s a great conversation starter (“Guess what? This cheesecake is made with cheddar!”). Plus, it’s a wonderful way to impress family and friends with something new.
Ingredients (and Why They Matter)
Here’s everything you need to make this Cheddar & Brie Japanese Cheesecake. I’ve included both metric weights and approximate US measurements for convenience:
· Cheese Slices (70g, about 4 slices): I use cheddar American cheese slices – those individually wrapped cheese slices. They melt smoothly and give a bold cheese flavor. You can use any similar processed cheddar or American cheese. (70g is roughly 4 standard slices). This is our secret ingredient replacing cream cheese.
· Brie Cheese (70g, about 2.5 oz): Brie adds a creamy, mild cheese flavor that complements the sharpness of the cheddar. Remove the rind and cut the Brie into small pieces. If you don’t have Brie, you can try Camembert or even a mild Gouda. Using two types of cheese gives a more complex flavor that’s “just right” – not too overpowering.
· Unsalted Butter (40g, 3 tablespoons): Butter adds richness and helps carry the flavor of the cheeses. It also contributes to the cake’s moist texture. Unsalted is best so we can control the saltiness (the cheeses already contain salt).
· Milk (100g, 100ml, about ⅓ to ½ cup): Milk helps melt the cheeses into a smooth mixture and adds moisture to the batter. Whole milk is ideal for a rich result.
· Cake Flour (45g, about 1/3 cup): Low-protein cake flour keeps the crumb tender and light. We’ll sift it in to avoid lumps. (If you don’t have cake flour, you can use all-purpose flour but the texture might be slightly less delicate.)
· Eggs – Separated (3 large eggs): We’ll use 3 egg yolks and 3 egg whites. The yolks add moisture, color, and richness to the batter, while the whites are whipped into a meringue to leaven the cake and make it fluffy. Make sure your eggs are at room temperature for best results (room temp eggs whip better).
· Sugar (60g, 1/3 cup): Regular granulated sugar, added to the egg whites, sweetens the cake and stabilizes the meringue. 60g makes the cake lightly sweet – you can increase to 70g (about 1/2 cup) if you prefer a sweeter cheesecake, but I find 60g just right since the cheese has some saltiness.
· Lemon Juice (2ml, 1/2 teaspoon): Just a tiny bit of lemon juice (fresh is best) helps stabilize the egg whites when whipping. It also cuts through the richness of the cheese ever so slightly, though you won’t really taste lemon in the final cake. (Vinegar or cream of tartar can also be used for stability, but lemon juice is natural and easy.)
Step-by-Step: How to Make a No-Cream-Cheese Cheesecake
Making this cheesecake is similar to a classic Japanese cotton cheesecake method. It involves melting the cheese, creating a smooth base batter, whipping egg whites, and baking gently in a water bath. Don’t worry – I’ll walk you through it! 😃
1. Prep the Pan and Oven:
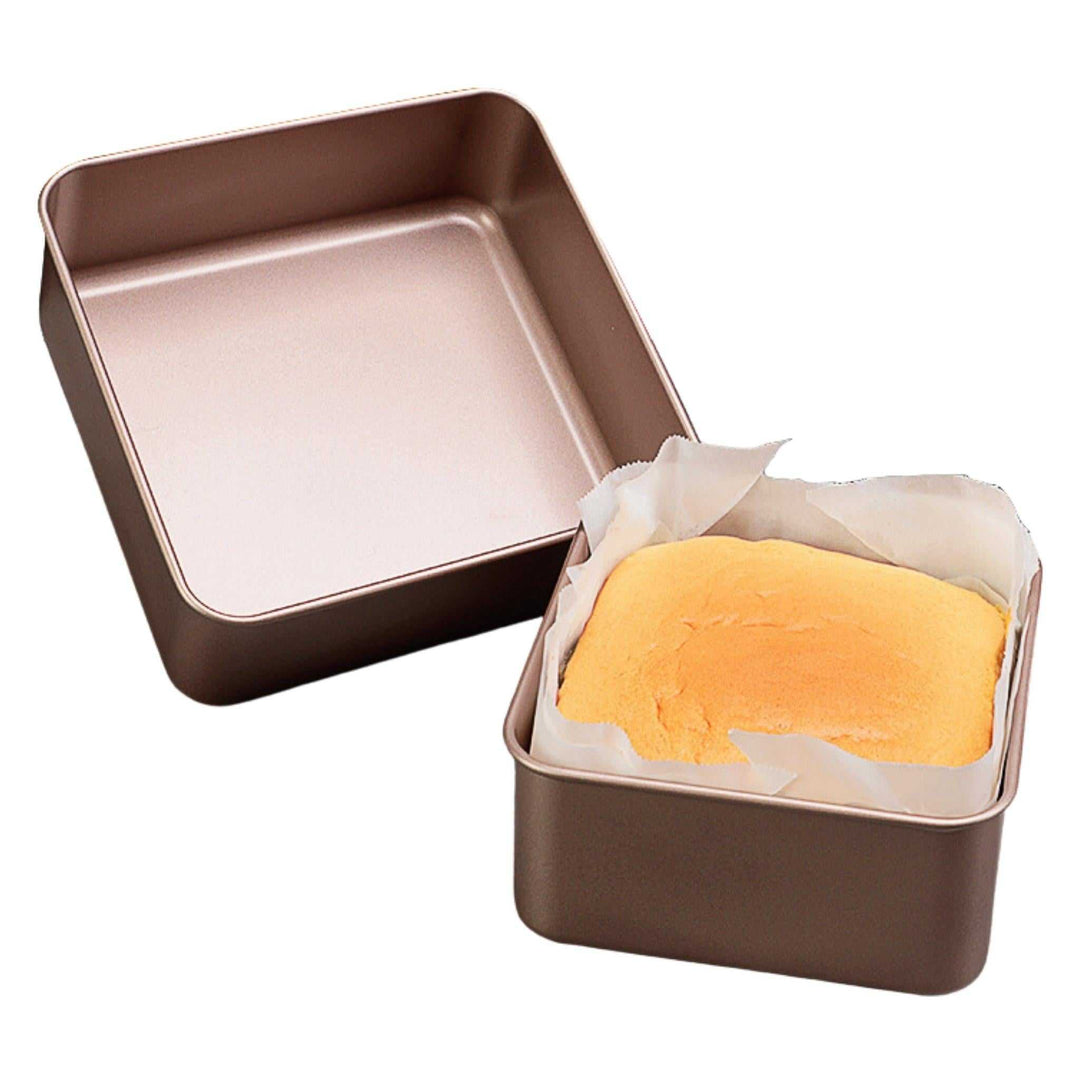
Grease your 6-inch cake pan and line it with parchment paper. Tip: For a tall cheesecake, line the sides with parchment that extends about 1 inch above the rim of the pan – this helps the batter climb and also makes removal easier. If your pan is one of those with a removable bottom, wrap the exterior tightly in aluminum foil to prevent leaks during the water bath.
Preheat your oven. If your oven has top and bottom heat settings (common in some ovens), set Top heat to 180°C (356°F) and Bottom heat to 110°C (230°F) for the first stage of baking. If you can’t control top/bottom separately, preheat to ~340°F (170°C) – we will start with a higher temperature then lower it after the cake is in. Also, put on a kettle of water to boil (for the water bath).
2. Melt Cheese, Butter & Milk:
In a heatproof bowl, combine the cheddar/processed cheese slices (torn into smaller pieces), the Brie cheese (remove the rind for a smoother mix), the unsalted butter, and the milk. We need to melt these together into a homogenous mixture. You can do this in the microwave or on the stovetop:
- Microwave method: Heat the bowl in 20-30 second bursts, stirring in between, until the cheeses and butter are fully melted and smooth. It may take a minute or two total depending on your microwave.
- Stovetop method: Set the bowl over a pot of simmering water (double-boiler style) and stir until everything melts into a smooth, creamy mixture.
Do not let the mixture boil – we just want it warm enough to melt the cheese. Once melted, stir well. You should have a thick, smooth cheese “custard” base.
3. Mix in Flour and Egg Yolks:
Remove the melted cheese mixture from heat and let it cool for a couple of minutes (it can be warm, but not piping hot, so we don’t scramble the egg yolks). Sift the cake flour (45g) into the warm cheese mixture. Use a whisk to gently mix until there are no lumps and the flour is fully incorporated. The batter may be a bit thick – that’s normal at this stage.
Now add the 3 egg yolks, one at a time, mixing well after each addition. (Or you can lightly beat the yolks first, then blend in.) Stir until you get a smooth, glossy batter. It will be a beautiful golden yellow from the cheese and yolks. If the mixture was still quite warm when you added the yolks, you might see tiny cooked bits – to avoid this, make sure to cool it slightly. Tip: If you notice any lumps or a bit of “skin” that formed on the batter while cooling, just whisk it well or even pour the batter through a sieve into a clean bowl. Sieving the batter at this point can make it extra smooth, ensuring a fine crumb in the final cake.
4. Whip the Egg Whites into Meringue:
Now the important part – making a fluffy meringue that will lift our cheesecake. Take your 3 egg whites. It’s best if they’re chilled; I like to separate my eggs in advance and keep the whites in the fridge until ready to whip (cold whites can sometimes give a more stable meringue with fine bubbles). Pour the whites into a clean, dry mixing bowl. Make sure there’s no grease or yolk in the bowl or on the whisk, or the whites might not whip properly.
Add the 2ml (½ tsp) of lemon juice to the whites. Begin beating on low speed until the egg whites become foamy and frothy with large bubbles. Then increase speed to medium and continue whipping. Gradually add the 60g sugar in three batches: sprinkle in about one-third of the sugar and whip for 20-30 seconds, then add the next third, and so on. This gradual addition helps build a stable meringue.
Continue beating the egg whites until you reach soft peak stage. This means the meringue is white, glossy, and when you lift the whisk, the peak that forms droops over (soft curl). Do not overbeat to stiff peaks, or the cake may rise too fast and crack (and the texture could be drier). Soft peaks are perfect – they will give the cake structure but still allow it to rise gently. (If you’re unsure, err on the side of slightly under-whipped rather than over-whipped.)
5. Fold Meringue into Batter:
Now we marry the two components. Take about 1/3 of the whipped egg whites and gently fold it into the cheese-yolk batter. You can use a whisk or spatula to do this, mixing lightly until no white streaks remain. This first addition lightens the consistency of the batter.
Next, pour this lightened batter back into the bowl of remaining egg whites. Using a spatula, fold gently but thoroughly. Use the classic folding motion: scrape around the bowl and lift through the middle, turning the bowl as you go. The goal is to combine them without deflating the air bubbles we whipped in. Fold just until you don’t see separate egg white foam or yellow batter – a few small streaks are okay, you don’t want to over-mix. The final batter should be airy and pale yellow.
Tip: Be gentle and patient in folding. It’s the trapped air in the meringue that will make the cake rise and become fluffy. If you knock out too much air, the cake can become dense or not rise fully.
6. Prepare Water Bath and Fill Pan:
Place your lined cake pan into a larger deep baking tray. I place my pan into a 28cm square cake roll pan (my handy Non-Stick Swiss Roll Pan) which acts as the water bath. You can also use a roasting pan or any oven-safe dish that fits the cake pan with some room around.
Give your batter a final gentle stir to pop any very large bubbles (or you can tap the bowl lightly on the counter a few times). Then pour the batter into the cake pan. For an even crumb, pour from a slightly high position (like 6-8 inches above the pan) in a thin stream – this helps break big bubbles. Once filled, tap the cake pan on the counter 2-3 times to bust extra air bubbles (you might see some bubble pops on the surface).
Now, slide the whole setup (cake pan inside water bath pan) into the preheated oven. With the oven rack pulled out slightly, carefully pour the hot/boiling water into the outer tray to create a water bath. Pour enough water to reach about 1 inch (2-3 cm) up the side of the cake pan. Be cautious not to splash water into your batter. Once the water bath is filled, gently push the rack back in.
7. Bake in Two Stages:
Baking this cheesecake in two stages helps it cook evenly and prevents the top from browning too quickly or the cake from collapsing. Here’s the schedule:
- Stage 1 – High heat: Bake at 180°C top / 110°C bottom for about 30 minutes. If your oven doesn’t have separate element controls, bake at ~340-350°F for 30 minutes. During this time, the cake will rise and the top will turn a light golden brown. Keep an eye on it; if by 30 minutes the top isn’t golden yet, give it a few more minutes but don’t overdo it. This initial higher heat helps “set” the structure and gives the cake its signature browned top.
- Stage 2 – Lower heat: After 30 minutes, lower the oven temperature to 150°C top / 110°C bottom (if single temperature, about 300°F). Continue to bake for another 50-60 minutes. For my oven and pan, 60 minutes at this lower heat was perfect. The cake will continue cooking through gently. You’ll know it’s done when the top is a deep golden brown, the cake has pulled slightly away from the sides of the pan, and it springs back when lightly touched. The center might still have a slight jiggle, which is fine – it will set as it cools. If you want to be sure, you can insert a skewer in the center; it should come out mostly clean (a few moist crumbs are okay).
(Note: Oven temperatures can vary. If you notice your cake browning too fast early on, you can tent a piece of foil on top or lower the temp a bit. Conversely, if after the full bake time the cake is very pale and not set, you may need to increase temp slightly or extend bake. The two-stage method is forgiving – the lower heat can be extended as needed until the cake is done.)
8. Cool Gradually:
When the cheesecake is done baking, do not remove it immediately to a cool counter. Sudden temperature changes can cause this delicate cake to shrink or collapse. Instead, turn off the oven, and crack open the oven door (just a few inches). Let the cake cool in the turned-off oven for about 20-30 minutes. This gradual cooling helps prevent the cake from shrinking too quickly and pulling away harshly.
After that, remove the cake pan from the water bath and place it on a wire rack. Let it cool to room temperature (it will still be slightly warm is okay). You’ll see that the cake might shrink a tiny bit and the top could wrinkle slightly – that’s normal for soufflé-style cheesecakes.
9. Unmold the Cheesecake:
Once the cake has cooled a bit (it can still be warm, but not hot to the touch), it’s time to remove it from the pan. If you lined the sides with parchment, it should be easy to lift out. Place a plate or cake board on top of the pan and invert the cake gently to release it. Then peel off the parchment paper from the bottom and sides. Finally, flip the cake upright onto your serving plate.
If your cake is completely cool, inverting is straightforward. If it’s slightly warm, be extra careful as it’s delicate. Note: I actually made a little goof – I removed the parchment from the sides before flipping out the cake on one attempt, and some of the cake’s side stuck to the pan, making the edges less neat (and I almost dropped the cake! 😅). So, leave the parchment on until after you invert to keep the cake’s edges smooth. If the cake doesn’t slide out right away, you can run a thin knife or offset spatula around the edge between the parchment and pan to loosen it.
One more tip: Before flipping out, gently touch the top surface of the cake – it should feel dry and set (not wet or sticky). If it’s at all wet, that means maybe it condensed a bit. It’s better to let it sit a bit longer or even refrigerate briefly to firm up before unmolding; otherwise, the top might stick and peel off on the plate.
10. (Optional) Decorate – Stamping a Design:
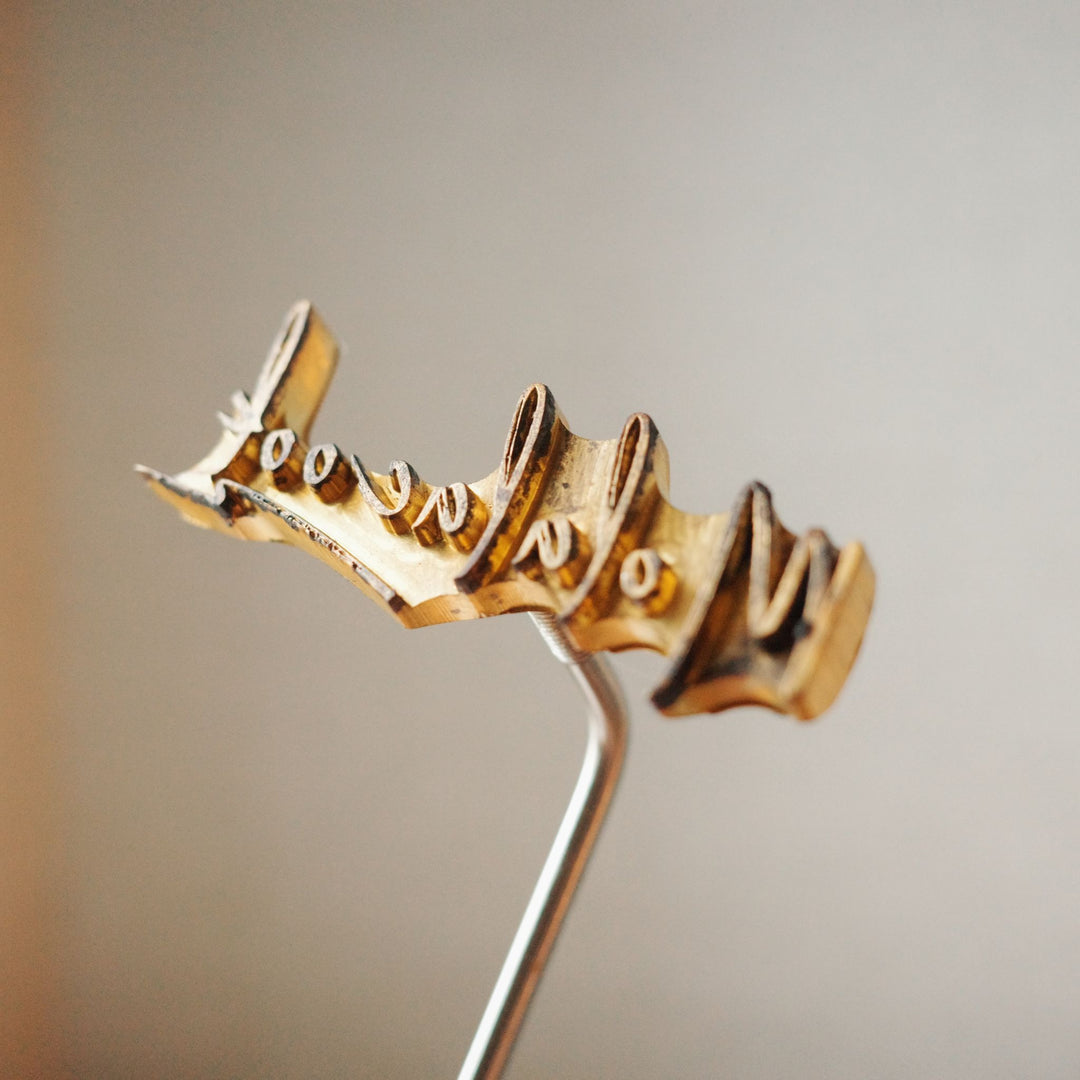
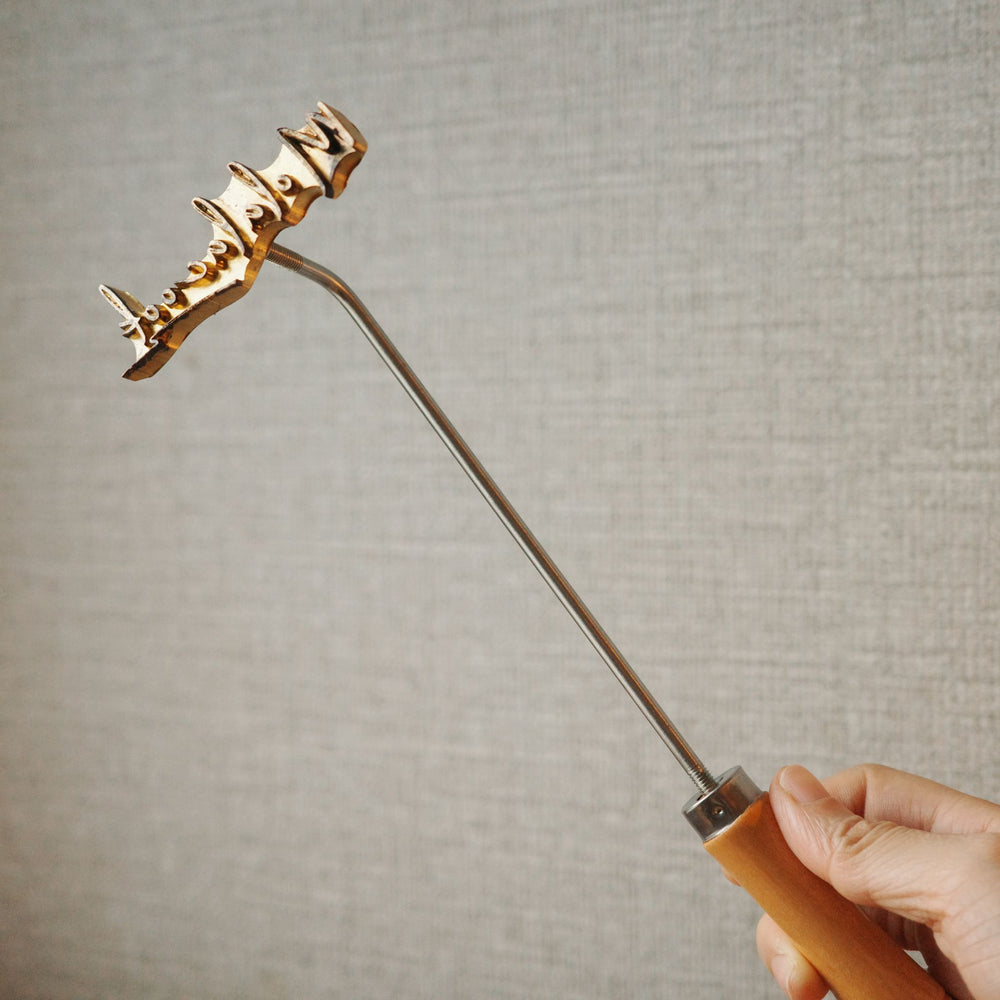
Now for a fun flourish! I like the classic look of a freshly baked Japanese cheesecake – golden brown top, often served plain. But this time I tried something special: branding the top with a custom cake stamp. I have a brass Custom Iron Cake Logo Stamp that I designed with a little cat face (modeled after my own cat 🐱). It’s basically a branding iron for cakes – you heat it up and press it on the cake to leave an imprint.
My custom brass cake stamp leaves an adorable cat face design on the cheesecake! I heated the stamp and quickly pressed it on top. (The stamp in the photo is 3 cm, suitable for small cakes or a corner design.)
To do this, I heated my brass stamp over a gas stove flame for about 2 minutes (you can also use a kitchen blowtorch). Be careful, the metal gets very hot – always use the wooden handle and wear oven mitts if needed. I then quickly but lightly pressed the hot stamp onto the cooled cake top for 1-2 seconds to sear the design. It leaves a cute browned impression of the cat image. Don’t press too long, or it can burn through the top crust (as I learned when I overdid one attempt and the stamp pulled off a bit of the cake’s skin!). Pro tip: Do a test stamp on a piece of bread or a paper towel first to check the heat and impression, so you get a feel for it before touching your beautiful cake. If you love this idea, you can create your own custom cake stamp with any design or text – mine is from my shop where we offer personalized brass stamps in various sizes (so you can literally stamp your logo, a message, or even your pet’s face onto your bakes!). It’s such a unique way to decorate, and makes for an awesome gift idea too.
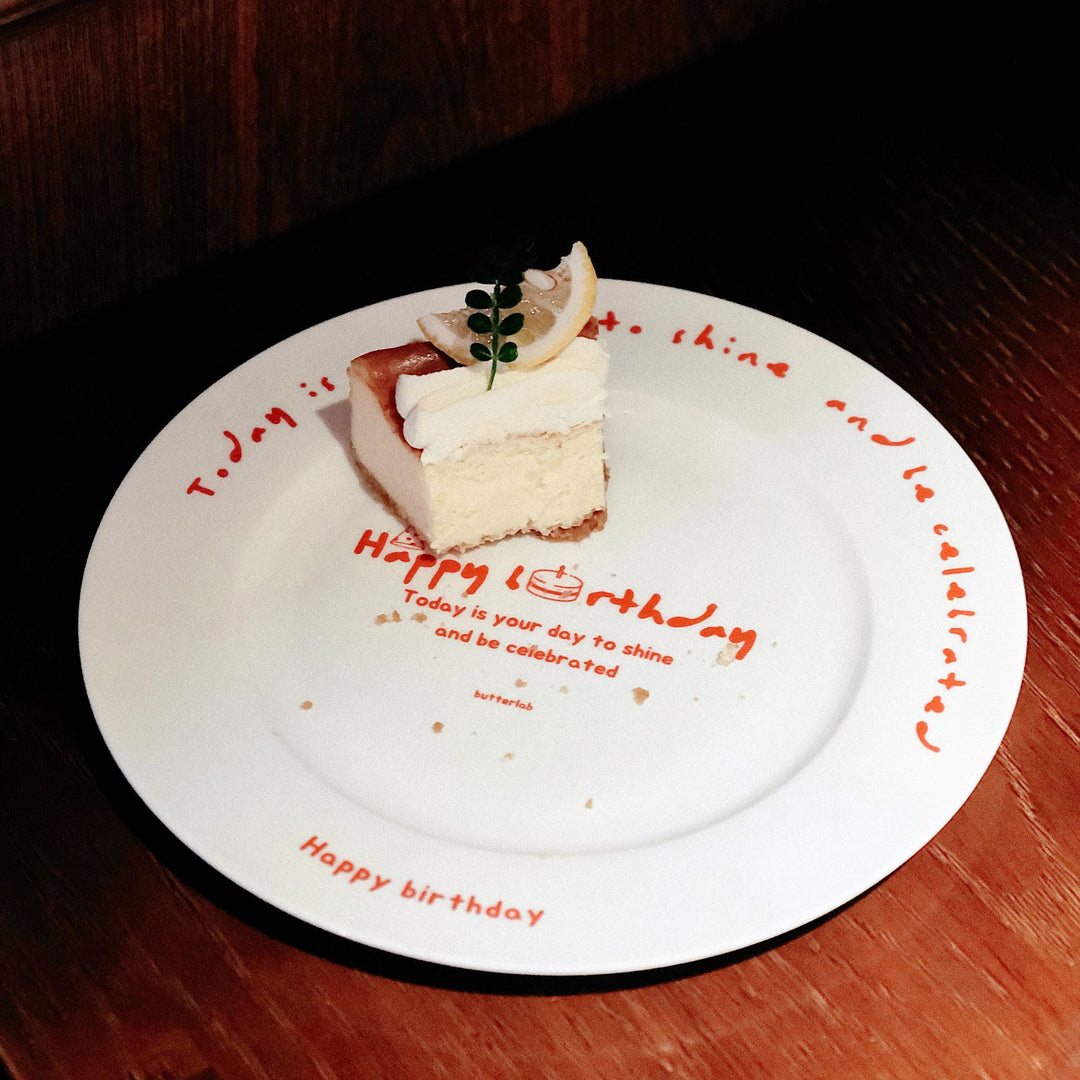
If stamping isn’t your thing, you can simply dust the top with a bit of powdered sugar, or serve the cheesecake with fresh berries or a drizzle of honey. But personally, I love the look of the minimalist browned top – it has that “Tokyo cheesecake shop” vibe that is charming on its own.
11. Chill (Optional) and Serve:
This cheesecake can be enjoyed warm, at room temperature, or chilled – each has its own allure. Warm (just slightly cooled) it will be ultra soft and custardy (it might collapse a bit as you cut, which is totally fine). At room temp it’s wobbly, cloud-like and moist. If you chill it in the fridge for a few hours (cover to prevent drying), it will firm up a bit and the texture becomes creamy and velvety, with the cheese flavor more pronounced. I personally love it after refrigerating overnight; it tastes almost like a rich cheese mousse cake, and it slices more cleanly.
Use a sharp thin knife to cut slices. Wipe the knife with a hot damp cloth between cuts for the neatest pieces. You’ll notice the inside is super fine-textured – no big holes, just a delicate sponge. The first bite literally melts in your mouth, and you get that mellow cheese flavor shining through. It’s not overly sweet, which keeps you coming back for more bites. In fact, when I eat this cheesecake, I hear a faint “suuuuu” sound – almost a little sigh or whisper from the airy structure collapsing on the tongue (it’s what I lovingly call the “sasa” sound as some describe, a tiny whisper of softness!). Absolutely delightful. 😋
Now, let’s cover some tips, FAQs, and pointers so you can nail this recipe and customize it to your liking!
Baking Tips & Important Notes
· Properly Whip the Egg Whites: The meringue is key to this cake’s rise and fluffy texture. Whip to soft peaks only. Overbeaten egg whites (stiff peaks) can cause the cake to rise too fast in the oven and then crack or collapse. Under-beaten whites (very soft) might not give enough lift. Soft peak (shiny and forms gentle curves) is the sweet spot. If you accidentally go a tad over and get medium peaks, it’s okay – just be extra gentle folding.
· Folding Technique: Always fold the meringue into the batter gently. Use a light hand and mix just until incorporated. It’s better to have a few tiny lumps of batter than to deflate everything with over-mixing. A good folding technique preserves the air bubbles that make the cake tall and jiggly.
· Preventing Cracks & Shrinkage: The water bath (bain-marie) is crucial. It provides moisture and even, gentle heat, which prevents the cheesecake from cracking on top and keeps the texture moist. Also, the gradual cooling in the oven helps minimize shrinkage. Rapid cooling can make the cake contract too quickly and crack or form deep wrinkles. So be patient and let it cool slowly.
· Lining and Unmolding: Use parchment paper to line the pan (bottom and sides) for easy removal. Since this cake is very tender, parchment ensures it won’t stick to the sides. When unmolding, remember the trick: don’t peel off the side parchment until after you flip the cake out, to avoid any sticking mishaps.
· Check for Doneness: It can be tricky to judge when a Japanese cheesecake is done. A good indicator: the top is golden brown and doesn’t jiggle like liquid. If you gently shake the pan, the center should wobble slightly like set Jell-O, not slosh around. You can also insert a toothpick in the center – it should come out with a few moist crumbs but no wet batter. If in doubt, it’s okay to turn off the oven a few minutes early and let the cake sit in the hot water bath; it will continue to cook gently with residual heat. This reduces the risk of overcooking (which can cause a drier texture).
· Adjust for Your Oven: Every oven is a bit different. The recipe calls for a very low bottom heat to avoid over-browning the bottom of the cheesecake (since it’s in a water bath, bottom heat isn’t as much an issue, but some ovens run hot below). If you cannot control bottom heat, just use the standard temperature and perhaps set the baking pan on a rack in the lower third of the oven to protect the top from overbrowning. If the top gets brown too fast, you can lower the temperature sooner or loosely tent foil shiny-side up over the cake around the 20-30 minute mark.
· Serving & Storing: This cheesecake is best stored in the fridge if not eaten within a few hours. Wrap it well (or keep in an airtight container) so it doesn’t dry out or absorb odors. It will stay fresh about 3-4 days refrigerated. You can also freeze leftover slices: wrap in plastic and foil, freeze up to 1 month. To enjoy, thaw overnight in the fridge – it’ll still taste great! (The texture might be slightly more moist after freezing, but because this cake is flour-stabilized, it holds up pretty nicely.)
Thank you
Your support means the world to me! 🥰 If you try this recipe, please let me know how it went in the comments or tag me on social media – I love seeing your creations. You can find more recipes on my blog and also on my YouTube channel (I often post video tutorials – I’m the ASMR baking girl with the cat, if you’ve seen those!). If you’re interested in the equipment I use, I have a curated list on Kit.co where I list my recommended baking tools and ingredients with links (you can find it at kit.co/molalacook). Feel free to take a peek at my kit for this recipe and others – it’s all there for your convenience.
Additionally, if you enjoy my content and want to support my baking journey, you can buy me a coffee on Ko-fi. I have a Ko-fi page at ko-fi.com/molalacook where I share some behind-the-scenes updates. Every little bit helps me keep developing recipes (and keep my oven running 😅). Thank you for even considering it!
Frequently Asked Questions


コメントを残す