

Hokkaido Milk Bread (Japanese Milk Bread)
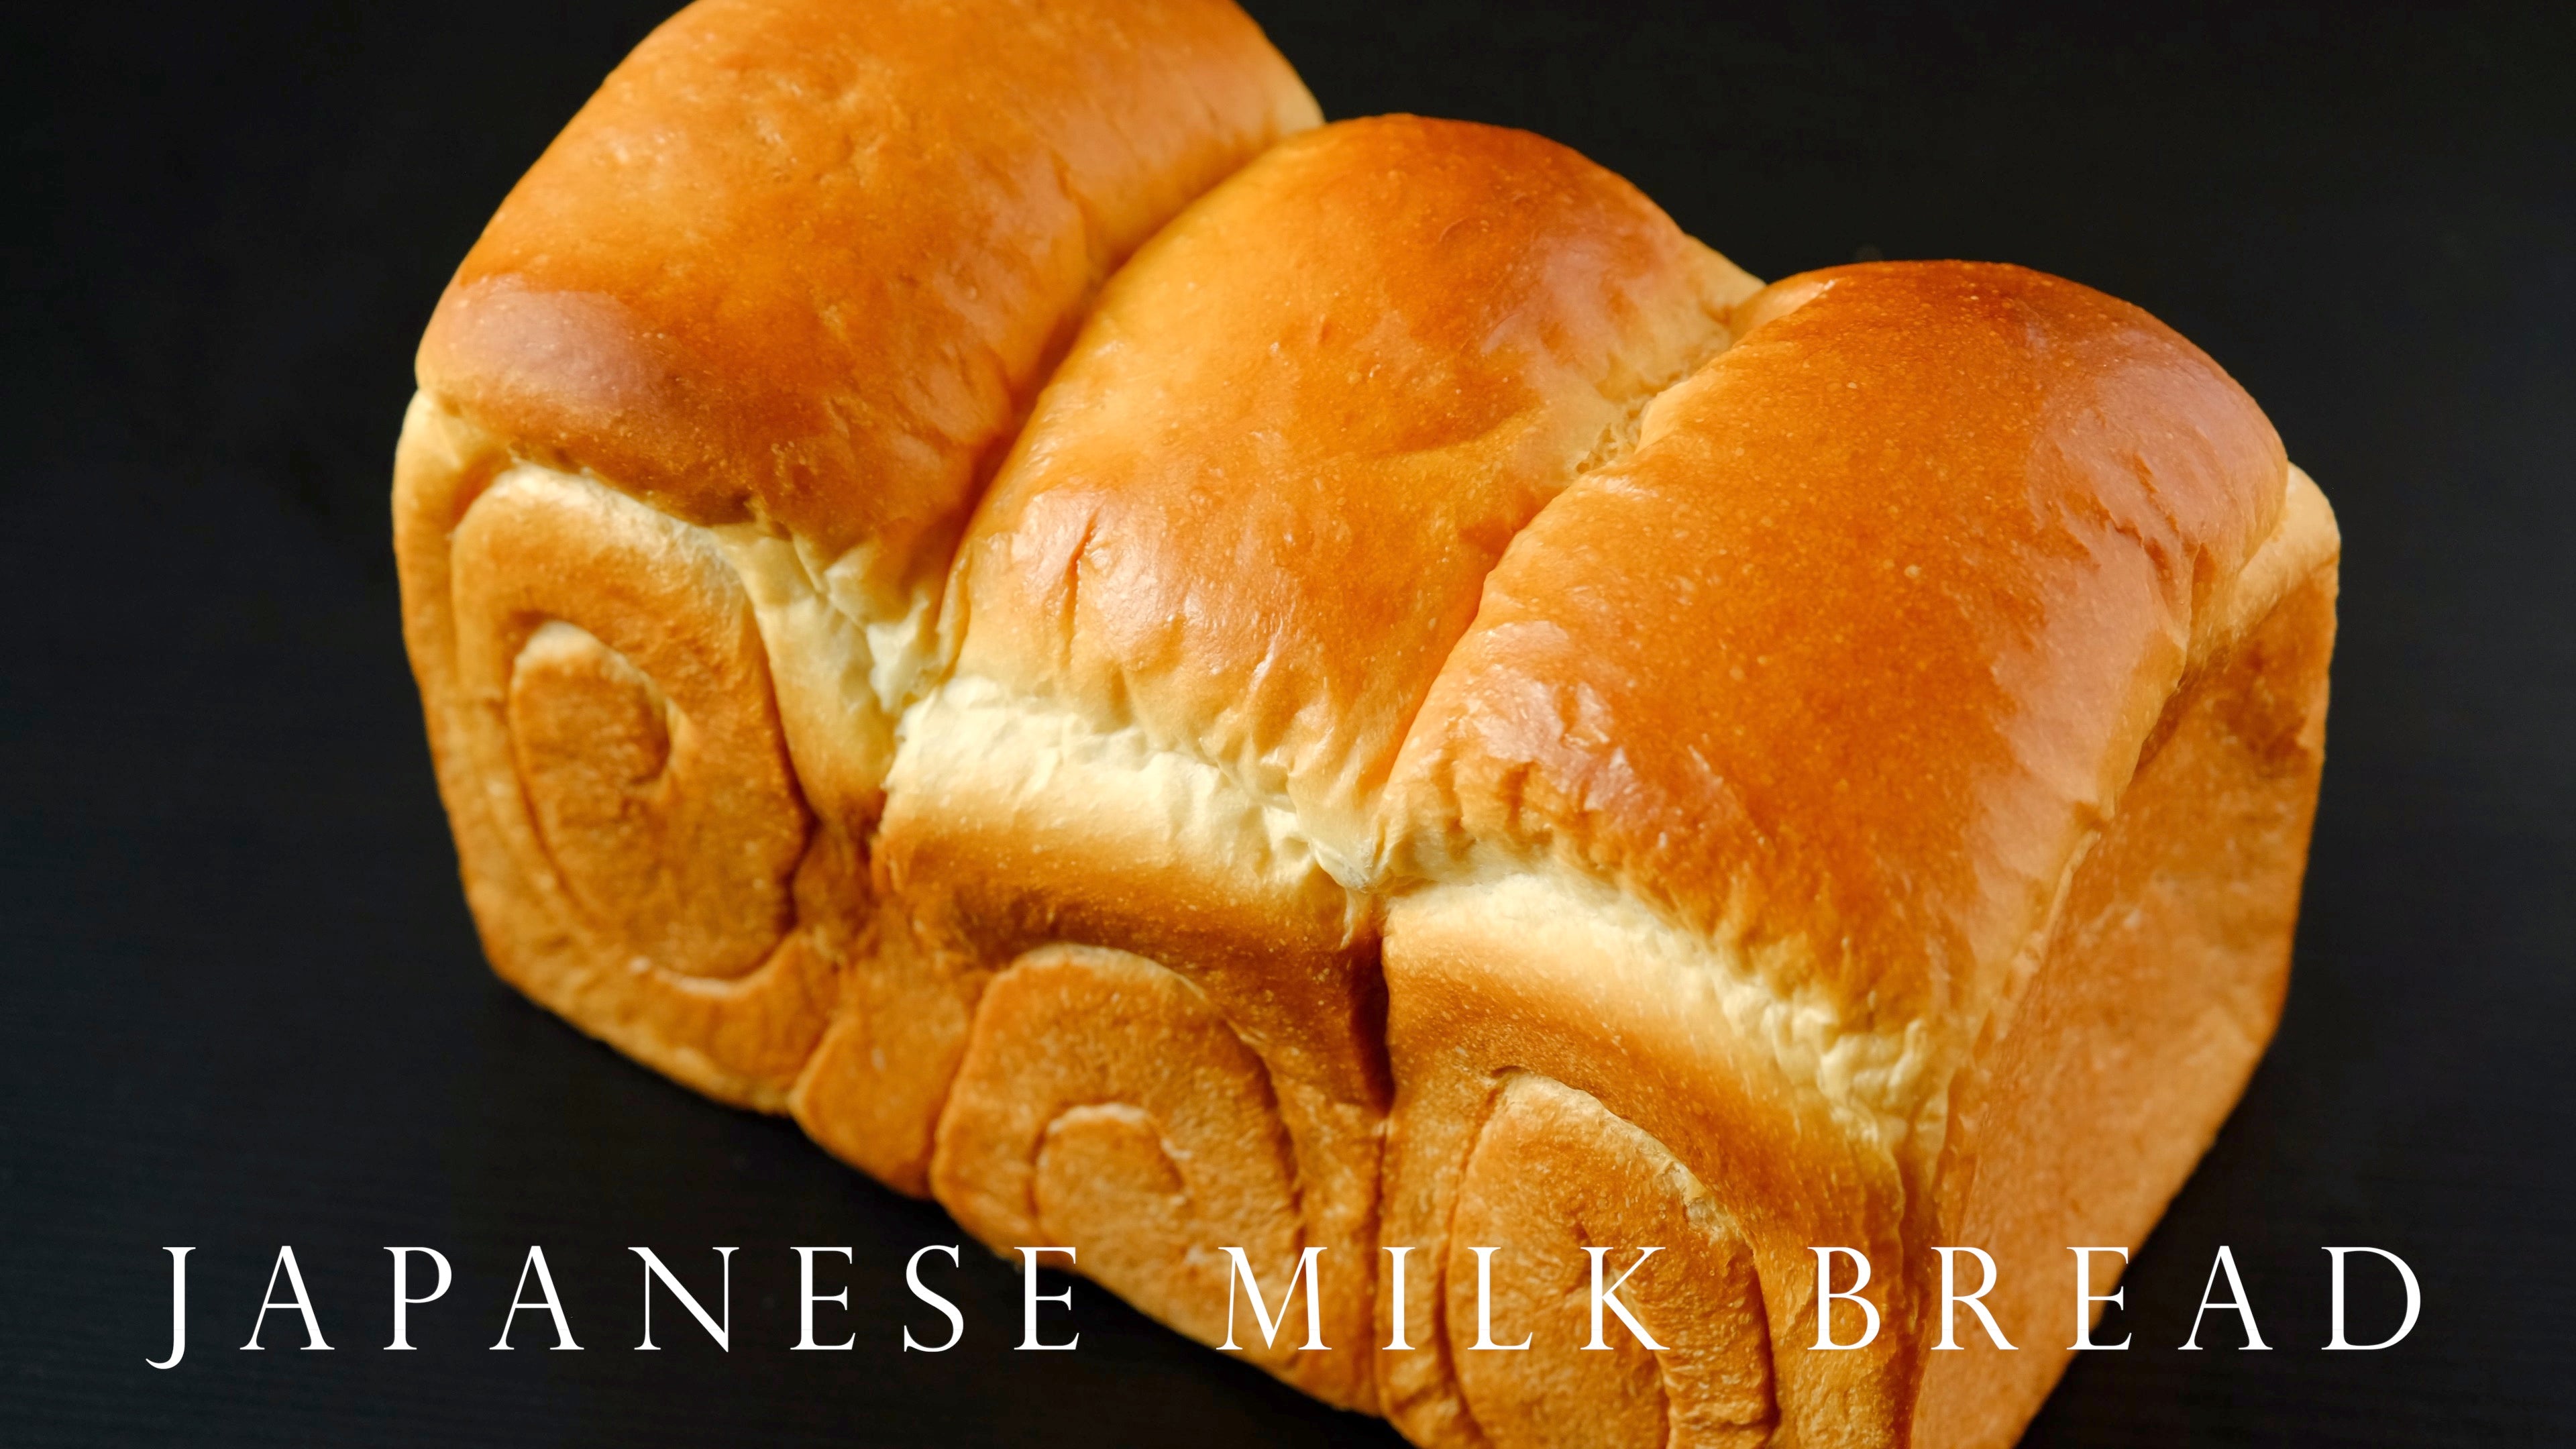
Table of Contents
Fluffy Hokkaido Milk Bread

INGREDIENTS
INSTRUCTIONS
Hokkaido Milk Bread (Japanese Milk Bread) – Tangzhong Recipe
When I first tasted Hokkaido milk bread at a small bakery, I fell in love with its pillow-soft texture and slightly sweet, milky flavor. I knew I had to recreate it at home. Hokkaido milk bread – also known as Japanese milk bread or shokupan – is famous for being feathery soft yet rich, pulling apart in delicate, wispy sheets of bread you can practically peel layer by layerfood52.com. It’s the kind of bread you can eat plain, make into the best sandwiches, or toast and slather with butter and jam. The best part? It stays soft and fresh longer than regular bread thanks to a special technique called the tangzhong methoden.christinesrecipes.com. In this post, I’ll share my personal Hokkaido milk bread recipe with step-by-step instructions, tips for success, an FAQ, and even some conversion advice for different pan sizes or measurements. Let’s bake this amazingly fluffy loaf!
A freshly baked Hokkaido milk bread loaf, known for its signature pillowy top and golden crust. This fluffy Asian white bread is incredibly tender and airy inside, thanks to the tangzhong water-roux technique that locks in moisture. We'll achieve a lofty, cloud-like loaf just like this in our home kitchen.
Ingredients You’ll Need (and Why)
This Hokkaido milk bread uses everyday baking ingredients, but each plays an important role in achieving that perfect texture and taste. Here’s what you need and some substitution tips:
-
Bread Flour (高筋麵粉) – The high protein content gives the bread structure and that chewy stretch. Bread flour helps the loaf rise tall and fluffy. (Can you use all-purpose? Yes, but bread flour yields a better rise and texture.)
-
Whole Milk (牛奶) – We use milk as the main liquid for a rich, tender crumb. It adds a slight milky sweetness to the bread. Use warm (110°F/43°C) in the dough to help activate the yeast.
-
Active Dry Yeast (酵母) – Our leavening agent. We’ll proof it in warm milk to wake it up. You can use instant yeast in equal amount; if so, you can mix it directly into the flour and skip the pre-proof step, though I still like to proof to ensure it’s alive.
-
Sugar (糖) – A quarter cup of sugar gives a gentle sweetness (this is a lightly sweet bread) and also feeds the yeast and helps with browning the crust. You can adjust sugar to taste (as low as 2 tablespoons or up to 1/3 cup for a sweeter bread).
-
Salt (鹽) – Just a teaspoon balances the sweetness and enhances flavor. Don’t skip it – even a sweet bread needs a little salt to not taste flat.
-
Unsalted Butter (奶油) – Added at the end of mixing, butter makes the bread tender, soft, and flavorful. We’ll knead in 2 tablespoons of softened butter, which also helps extend the bread’s shelf life (fat = moisture). If using salted butter, reduce the added salt a bit.
-
Eggs (雞蛋) – This recipe uses 2 eggs: one goes into the dough for richness, structure and that brioche-like tenderness; the other is for an egg wash to give the loaf a glossy, golden top. Room temperature eggs are best for even mixing.
-
Milk Powder or Condensed Milk (奶粉 或 煉奶, optional) – I sometimes add 1 tablespoon of milk powder (or sweetened condensed milk) to boost the milkiness. This is optional, but a common ingredient in milk bread recipes for extra flavor. If you have it, use it!
-
Tangzhong (湯種) – Last but not least, the star of the show. This is made from bread flour and water (some use part milk). We’ll cook 2 tablespoons flour with 6 tablespoons of water to form the tangzhong. It will be a thick paste that gets incorporated into the dough. This magic paste is what makes the bread so soft and moistkingarthurbaking.com, so be sure to include it.
Equipment: All you need is a standard loaf pan and basic kitchen tools. I use a 9 x 5 inch loaf pan (or an 8½ x 4½ inch works too – that’s about 21 x 11 cm). A stand mixer with a dough hook is very helpful for kneading this enriched dough (it is a sticky dough!), but you can knead by hand with some patience. If you have a bread machine, you can even use it on the dough cycle for mixing and first rise. We will also use a small saucepan for the tangzhong. To ensure accuracy, I recommend using a kitchen scale to measure ingredients (I’ve provided gram measurements). Measuring by weight guarantees consistent results – e.g. 1 cup of bread flour is ~128g. Finally, prepare some plastic wrap or a damp towel for covering the dough as it rises.
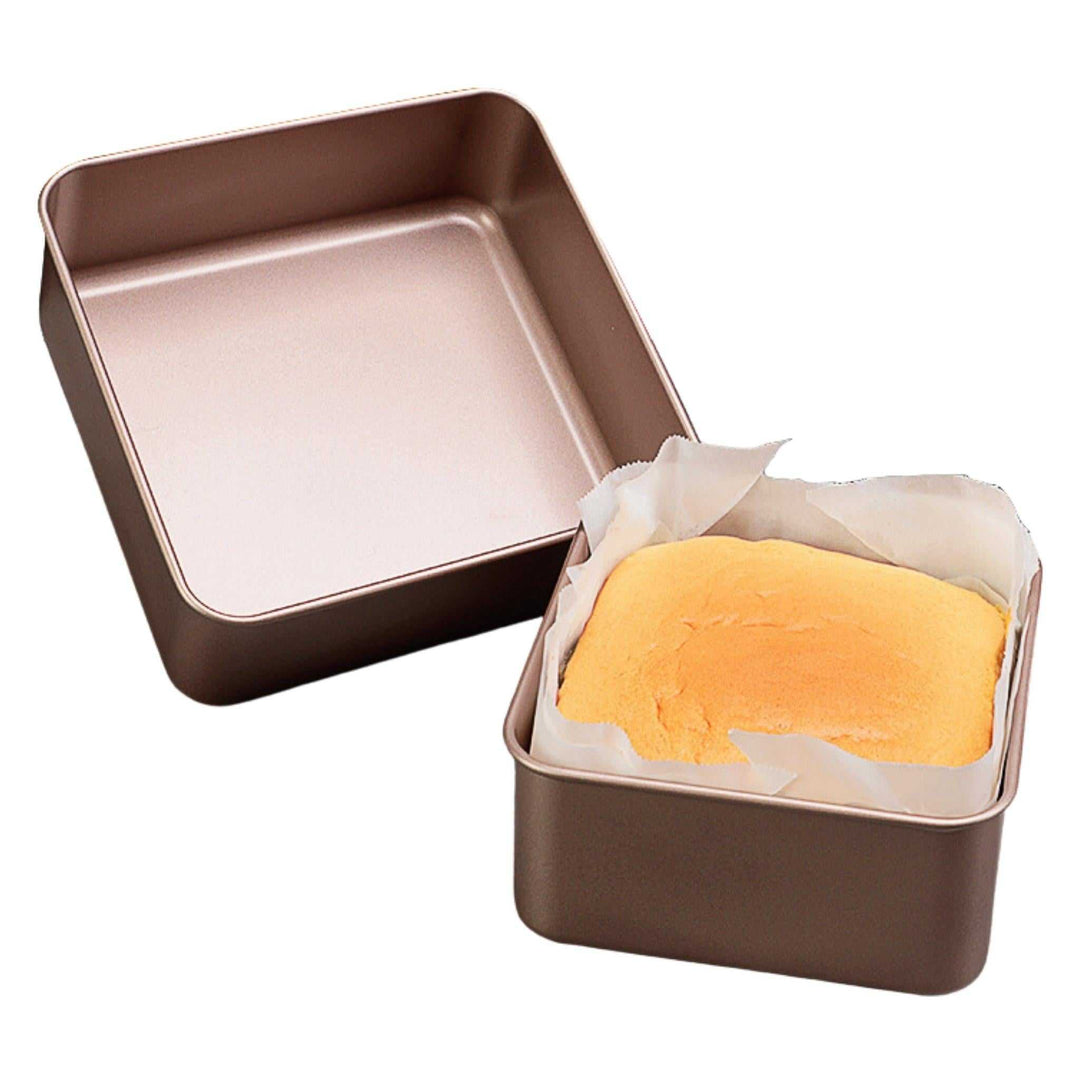
Choosing the Right Loaf Pan
For this Hokkaido milk bread recipe, I recommend using a Professional Pullman Loaf Pan with Lid (450g) — this is the one I personally use and love. It measures approximately 9x4x4 inches, and it’s perfect for achieving that tall, fluffy loaf with a square shape if you use the lid. You can find the exact one I use here on my online store.
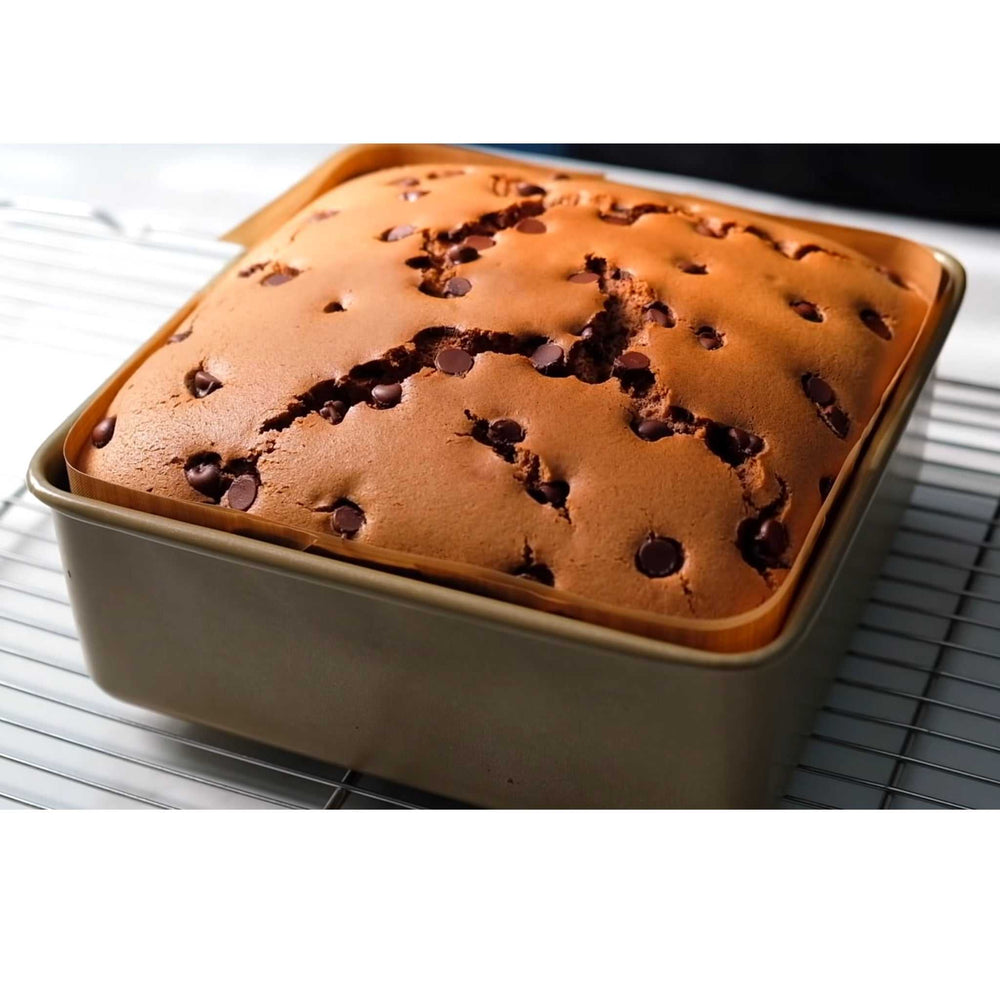
If you prefer a smaller loaf or want to try a half batch, I suggest using the Red Pound Cake Loaf Pan, which is great for 250g dough portions. It has a gorgeous non-stick coating and makes cleanup super easy. You can grab it here.
💡 Quick Tip: A sturdy pan really makes a difference. Look for carbon steel or cast aluminum with a non-stick finish — it ensures even heat distribution and gives your bread a beautiful golden crust. Avoid flimsy pans that warp or bake unevenly.
Alright, let’s get into the actual recipe now that we’ve covered the basics!
Hokkaido Milk Bread Recipe
Yield: 1 loaf (about 9x5 inch) | Prep Time: ~30 minutes (active) + 2–3 hours rising | Bake Time: ~30 minutes
Instructions:
-
Make the Tangzhong: In a small saucepan, whisk together 2 Tbsp flour and 6 Tbsp water until smooth (no lumps). Place over medium-low heat and cook, whisking constantly, until the mixture thickens into a gel-like paste. This takes about 3-5 minutes; you’ll know it’s ready when the whisk leaves lines or trails on the bottom of the panfood52.comkingarthurbaking.com. Remove from heat. Transfer the tangzhong paste to a clean bowl and let it cool to room temperature. (Tip: To speed up cooling, spread it in a thin layer on a plate.) This cooked roux will be added to the dough to give that soft texture.

-
Activate Yeast (if using active dry): If you’re using active dry yeast (skip this step for instant yeast), warm the ¼ cup milk to about 110°F (it should be warm to touch but not hot). Stir in 1 tsp of the sugar and sprinkle the yeast over the milk. Let it sit for 5-10 minutes until it gets foamy. This ensures the yeast is alive. (If using instant yeast, you do not need to proof – you can add it directly in step 3, and also heat the milk and add directly.)
-
Mix Dry Ingredients: In a large mixing bowl (or the bowl of a stand mixer), combine the bread flour 230g, ¼ cup sugar, and 1 tsp salt. Whisk these dry ingredients together so the salt and sugar are evenly distributed.

-
Add Wet Ingredients: In a separate bowl or large measuring cup, mix together the cooled tangzhong paste , milk and 1 egg. Whisk until fairly smooth. Now add the yeast into this wet mixture and stir to combine. You should have one bowl of dry ingredients and one combined bowl of wet ingredients (with tangzhong, milk, egg, etc.).
-
Make the Dough: Pour the wet ingredients into the bowl of dry ingredients. Using a wooden spoon or spatula, stir until it forms a shaggy dough and most of the flour is absorbed. It will look messy and sticky – that’s okay! If using a stand mixer, fit it with the dough hook and mix on low speed to bring the dough together.
-
Knead the Dough: Now it’s time to knead until the dough develops a smooth, elastic texture. If using a stand mixer, increase to medium speed and knead for about 5-8 minutes total. If kneading by hand, turn the dough out onto a lightly floured surface and prepare for a bit of an arm workout – it may take 10-15 minutes of kneading. Note: The dough will start out very sticky and wet. You will likely need to add a bit of the reserved extra flour (sprinkle in 1 tablespoon at a time, up to about ¼ cup/30g) as you knead to keep it manageable. Avoid dumping in a lot of flour at once; you want to add just enough so the dough becomes tacky but not soupy. It’s normal for this enriched dough to stick to your hands at first – use a bench scraper to help lift and fold it. As you knead (or as the mixer works it), gluten will develop and the dough will become more cohesive and smoother.

-
Knead in Butter: Once the dough is somewhat smooth (after those first few minutes of kneading), add the softened butter, 1 tablespoon at a time. Smear the butter into the dough and continue kneading. At first, the dough will slip and come apart when the butter is added – it will feel messy and greasy. Keep kneading and folding; the butter will gradually incorporate. This step can take another 4-5 minutes of kneading. Eventually, the dough will absorb the butter and become very soft, supple, and slightly glossy. When done, the dough should be able to stretch without tearing easily and feel a bit sticky to the touch but pull away from the bowl or counter cleanly. (If you perform the “windowpane test,” you should be able to stretch a bit of dough into a thin membrane without it tearing – indicating good gluten development.)

-
Troubleshoot: If the dough is extremely sticky even after thorough kneading (sticking in strings to the bowl or your fingers), you can knead in another tablespoon or two of flour. But try not to add too much extra flour – a sticky dough yields a lighter bread. As expert Christine Ho notes, tangzhong dough can be “extremely sticky” and challenging by hand, but that moisture is what makes the bread so soften.christinesrecipes.com. Using a stand mixer or bread machine can make this step easier if you find hand-kneading too tough.
-
-
First Rise (Proofing): Form the dough into a ball and place it in a large, lightly oiled bowl. Cover the bowl with plastic wrap or a damp cloth. Let the dough rise in a warm place for about 1 to 2 hours, or until doubled in size. Ideal fermentation temperature is around 75–80°F (24–27°C). In a cooler room, it will just take longer. Tip: You can also proof this dough overnight in the refrigerator at this stage if you prefer. A slow, cold rise (8-24 hours in the fridge) will develop even more flavor. If doing overnight, cover the bowl tightly (to prevent drying) and note that the dough will rise more slowly (and maybe not double completely until you bring it back to room temp). Whether you rise at room temp or overnight, the dough is ready for the next step when it has doubled.
-
Punch Down & Divide: After the first rise, gently punch down the dough to deflate excess gas. Turn it out onto a lightly floured surface. For a traditional Hokkaido milk bread look, divide the dough into 3 equal portions (you can do 4 portions if you prefer smaller “lobes” – dividing into 3 or 4 pieces will both work). Round each portion into a loose ball. Cover them with a towel and let rest for 15 minutes. This short rest (called bench rest) relaxes the gluten, making the dough easier to shape.

-
Shape the Loaf: Now we’ll shape each portion and place them into the loaf pan, which gives the bread its distinctive pull-apart sections. Working one piece at a time, use a rolling pin to roll a dough ball into an oval or rectangle (roughly 8 inches long). Fold the oval into thirds, like folding a letter: bring the top third down to the center and the bottom third up over it, so you have a layered rectangle. Then roll this folded dough out again into a long strip (about 10–12 inches long). Finally, roll it up tightly from one short end, like a jelly roll or cinnamon roll. You’ll end up with a tight log of dough. Place this log seam-side down into your greased loaf pan. Repeat with the other portions, placing each log in the pan side by side. (If using a Pullman loaf pan with a lid, you’d do the same but you might make 2 longer logs instead of 3 to fit a longer pan.) The pan will look about 1/2 to 2/3 full of dough logs.

-
Second Rise: Cover the loaf pan with plastic wrap or a damp cloth and let the dough rise again in a warm spot. This second proofing will take about 45 minutes to 1 hour (potentially 1.5 hours if your room is cool). You want the dough to rise to approximately near the top of the loaf pan. It may not double in volume, but it should puff up considerably. If you gently poke the dough, it should spring back slowly and leave a slight indent. Do not over-proof to the point of spilling over the pan; the loaf will also rise more in the oven (oven spring).

-
If using a Pullman pan with lid: Rise until the dough is about ¾ inches from the lid, then you can put the lid on before baking. This will give you a perfect square shape. (Do not let it over-proof such that it touches the lid before baking, or it will compress.)
-
-
Bake the Bread: Near the end of the proofing, preheat your oven to 350°F (175°C). Brush the risen loaf with an egg wash (beat the remaining egg with 1 Tbsp milk, and gently brush the top of the dough) for a glossy, golden crust. (If you don’t want to use egg, you can brush with just milk or cream – it won’t be as shiny, but will help browning.) Bake the bread in the center of the preheated oven at 350°F for about 28–35 minutes. Every oven is different, so start checking around 25-28 minutes. The loaf is done when it’s a deep golden brown on top and sounds hollow when you tap it. An instant-read thermometer in the center should read around 190°F (88°C). If the top is browning too quickly before the time is up, you can tent it loosely with foil to prevent over-browning. (In my oven, I bake for ~30 minutes and sometimes cover for the last 5 minutes to avoid too dark a crust.)

-
Cool the Bread: Remove the loaf pan from the oven. If you used a Pullman pan with lid, carefully slide off the lid immediately. Let the bread cool in the pan for about 5-10 minutes, just until it’s firm enough to handle. Then gently turn out the loaf onto a wire cooling rack. It should release easily, especially if you used a good non-stick or greased the pan well. Allow the bread to cool completely (at least 1 hour) before slicing. This step is hard (who doesn’t want to tear in right away?), but cutting while hot can squish the bread and make it gummy. The bread will slice much more cleanly when fully cooled – and rest assured, it will still be soft and moist!
-
Enjoy: Hokkaido milk bread is best enjoyed fresh within the first couple of days. Slice it up and enjoy as is, or spread on some butter, jam, or my favorite – condensed milk for a real treat. The bread pulls apart beautifully into soft, feathery slices. Get ready for possibly the best toast or sandwich bread of your life!
Important Tips & Notes
-
Measure Accurately: For best results, measure ingredients by weight (grams) if you can. Bread baking is a science – too much flour can make your dough tough. If using cups, use the scoop-and-level method and don’t pack the flour. 1 cup of bread flour is ~125-130g. Precise ratios matter, especially for the tangzhong (too much water or flour in it can alter the dough).
-
Tangzhong Texture: Cook the tangzhong until it’s like a thick pudding or paste and you see streaks at the bottom of the panfood52.com. Under-cooking it (too liquid) or over-cooking (too stiff) can change how it integrates. Let it cool to at least lukewarm. Adding it hot could inadvertently cook the egg or activate gluten too early. I sometimes make tangzhong first and set it aside while prepping other ingredients.
-
Kneading is Key: This dough requires a good amount of kneading to develop the gluten. Don’t be alarmed when it’s sticky – that’s normal for enriched doughs. Resist the urge to keep adding flour; a wet dough = a softer bread. Use a stand mixer if possible, or knead using the slap-and-fold method on a surface. You know you’ve kneaded enough when the dough is smooth and can stretch thin (do the windowpane test). If you don’t knead enough, the bread might turn out dense or won’t rise well.
-
Dough Too Sticky? As Christine Ho (a well-known tangzhong bread expert) notes, tangzhong dough can be very sticky to handle by handen.christinesrecipes.com. Lightly oiling your hands can help during hand kneading instead of adding lots of flour. A bench scraper is your friend to scrape and fold the dough. If using a mixer, it’s fine if the dough sticks to the bowl bottom, but it should pull away from the sides. Add small sprinkles of flour only as needed. The final dough should be a bit tacky but manageable.
-
Proper Proofing: Be patient with rising times. If your kitchen is cold (<70°F/21°C), the dough will take longer to rise. You can create a warm environment by placing the bowl in a turned-off oven with the light on, or next to a warm stove. Just don’t exceed ~90°F or you risk killing yeast or melting the butter. Under-proofing can cause a dense loaf, and over-proofing can make the loaf collapse. A good rule: first rise until doubled (time is a guide, volume is what to watch), second rise until the dough has grown to fill the pan and is just below the rim.
-
Pan Matters: Use the correct size loaf pan. A standard 9x5 inch pan is perfectmolalacook.com – it gives the bread room to expand upward. If your pan is smaller or larger, adjust the dough amount or be prepared for a different shape. Pullman Pan: If using a Pullman loaf pan with a lid (for a square loaf), this recipe quantity (~600g total dough) fits a 450g Pullman pan (about 9″ long). For a smaller 250g mini Pullman, use half the recipe. Always leave room for the dough to rise to prevent overflow.
-
Baking Adjustments: All ovens are different, so keep an eye on your bread the first time you bake this. If you know your oven runs hot, lower the temp to 340°F (170°C). If the top is browning too fast, tent with foil in the last 10 minutes. Conversely, if the loaf seems pale at 30 minutes, let it go a bit longer or raise temp slightly next time. The internal temperature of fully baked enriched bread should be around 190°Ffood52.com. If you don’t have a thermometer, judge by color and the hollow thump test.
-
Cooling & Slicing: Let the bread cool completely before slicing – I cannot stress this enough! It’s tempting to tear off a piece while it’s warm (and you certainly can enjoy a bite warm), but if you plan to slice for sandwiches, a cooled loaf will cut much more cleanly, with that fine, feathery crumb. Use a serrated bread knife in a gentle sawing motion to avoid squishing the loaf.
-
Storage: Because this bread is so moist and rich, it stays soft for up to 3-4 days at room temperature (if it lasts that long!). To store, keep it tightly wrapped or in an airtight container once completely cool. I like to store mine in a bread box or a resealable bag. You can even place a ceramic bread saver in the container – a little gadget that helps keep baked bread moist and softmolalacook.com. (We sell a cute ceramic bread saver in our shop that you can tuck in with your loaf to keep it fresh – it really works wonders to prevent the bread from drying out!molalacook.com) Avoid refrigerating bread (it will dry it out faster). For longer storage, freeze sliced bread (separated by parchment or foil, in a zip-top bag) for up to 1-2 months. Frozen slices reheat well in a toaster or 300°F oven wrapped in foil.
-
This Recipe is Flexible: You can use this dough to make dinner rolls or buns instead of a loaf. Just divide into 8-10 rolls, shape, and bake on a sheet pan (bake ~18-20 minutes or until golden). You can also add fillings or toppings: for example, roll out each portion and sprinkle cinnamon sugar for a swirl, or add raisins to the dough for raisin milk bread. Just be careful not to add too many mix-ins that might weigh down the dough.
-
Plan Ahead: The overall process takes around 3-4 hours including rises (or longer if doing an overnight rise). The hands-on work is maybe 30 minutes. It’s a great recipe to do on a weekend afternoon. If you want fresh bread in the morning, you can do the first rise overnight in the fridge, then shape and bake in the morning.
Now that you know all the do’s and don’ts, you’re set up for success. Hokkaido milk bread may require a bit of effort and patience, but the result is so worth it – a loaf that’s ultra soft, high and light, and stays deliciously fresh for days.
FAQ (Frequently Asked Questions)
Q: How do I know when the dough is kneaded enough?
A: The dough will transform as you knead. In the beginning it’s lumpy and sticky. When it’s properly kneaded, it becomes smooth, springy, and a bit shiny. It should pull away from the sides of the bowl or not stick terribly to your hands. A good test is the windowpane test: take a small piece of dough and stretch it gently – you should be able to stretch it into a thin translucent membrane without it tearing immediately. If it tears easily, it needs a few more minutes of kneading. Another sign is that the dough will form a nice cohesive ball that holds its shape. Remember, enriched dough (with butter and egg) may not become as taut as lean dough, but it should be elastic. And if you’re using a mixer, 8-10 minutes is usually sufficient.
Q: How can I adjust this recipe for a larger loaf or smaller loaf?
A: Scaling this recipe is quite straightforward. If you want to make two loaves, just double all ingredients. You can then bake in two pans (or bake one after the other). If you double it, a stand mixer might struggle, so knead in batches or by hand if it’s too much dough for your machine. To make a smaller loaf (say in a mini pan), you can halve the recipe. As mentioned, a half recipe would suit a mini 250g Pullman pan. When scaling, keep the ratios the same. One thing to note: yeast doesn’t always need to be exactly doubled for a double batch – you could use a slightly smaller percentage of yeast when scaling up (like 2¼ tsp instead of 3 tsp for a double recipe) because too much yeast can over-leaven if the dough sits too long. But if you plan to bake right after rising, doubling yeast is fine. Baking time may vary if your loaf size changes: smaller loaves or rolls bake faster (check around 20-25 min), a larger single loaf might need a few extra minutes (35-40 min). Always use visual cues and internal temp to judge done-ness.
Q: How do I store the bread and keep it soft?
A: As noted in tips, keep the bread well-wrapped at room temp. I usually put mine in a zip-top plastic bag, squeeze out extra air, and keep it on the counter. Avoid fridge storage. If you have a bread box, that’s great. To keep it ultra soft, you can use a bread saver – a small food-safe ceramic that, when soaked in water and placed with the bread, helps maintain humiditymolalacook.com. (It keeps the inside crumb from drying out, while the crust stays a bit crisp.) Our Bread Saver product is perfect for this – just soak it and pop it in the bread container. If your bread has gone a bit stale, try reviving it with a very light mist of water and a 5-8 minute warm-up in the oven; it will refresh the softness. For long-term storage, freeze slices and toast as needed. The bread also makes amazing French toast if it gets slightly stale!
Q: Can I use a bread machine to make Hokkaido milk bread?
A: Yes – you can let a bread maker handle the kneading and first rise (dough cycle). Add ingredients in the order your machine specifies (often liquids + tangzhong + egg first, then dry on top, yeast last away from salt). The machine will mix and knead; you might open and check if it needs a bit more flour or liquid. After the dough cycle (usually 1.5 hours), take the dough out, shape into the loaf pan, let rise, and bake in your conventional oven as per instructions. Some bread machines can bake a milk bread loaf start-to-finish, but I prefer oven baking for best texture and crust. Many of my readers have successfully used bread machines for the hard work of kneading this sticky dough – so that’s a great shortcut!
Q: Why is my bread’s crust so dark or thick?
A: A dark crust could mean it baked a bit too hot or too long. Make sure you’re at 350°F and not higher (ovens can be off; an oven thermometer helps). Also, using a dark-colored pan can brown crust faster because dark pans absorb more heat – you might reduce baking temp by 10°F if using a very dark pan. Enriched dough tends to brown quickly due to the sugar and milk – that’s normal, but if it’s getting too dark too soon, definitely tent with foil. If the crust is coming out too thick/hard for your liking, you can brush the top with melted butter right when it comes out of the oven; that softens and adds flavor to the crust. Also, avoid over-baking – once it’s golden and at 190°F internally, it’s done. One more trick: place a pan of hot water on the lower rack for the first 10 minutes of baking to create steam – this can keep the crust thinner and soft (and promote oven spring). I sometimes do this to mimic bakery steam ovens.
Q: What are some other ways to enjoy Hokkaido milk bread?
A: Honestly, this bread is so good it’s often eaten plain! But it’s incredibly versatile. In Japan, thick-sliced milk bread is used for morning toast (often with butter and jam, or drizzled with sweetened condensed milk – trust me, it’s heavenly). It makes excellent sandwich bread – think egg salad sandwiches or Japanese fruit sandos (whipped cream and fruit sandwich) if you’re adventurous. You can also use it for French toast; because it’s so tender, it soaks up custard beautifully and yields a rich French toast. Another idea: make bread pudding with any leftovers that get stale (you’ll end up with an insanely soft pudding). Essentially, use Hokkaido milk bread anywhere you’d use a white sandwich loaf, and it will instantly elevate the dish because of its flavor and texture.
I hope this FAQ clears up any questions! If you have others, feel free to ask in the comments.
Final Thoughts
You’ve made it through a deep dive into Hokkaido milk bread – congrats! 🥳 This recipe is truly one of my favorites; it might take a bit of time, but the reward is a tall, fluffy loaf that will make your kitchen smell like a dream. Each bite is milky, soft, and just sweet enough. Whether you’re a seasoned baker or a newbie, I encourage you to give this a try – it’s nearly foolproof if you follow the tangzhong method and tips above.
Serving idea: Tonight, I’m planning to toast a slice, spread on some butter, and sprinkle a pinch of sea salt – simplicity at its best. And tomorrow morning, french toast with the remaining loaf! 😋
If you try this Hokkaido milk bread recipe, let me know how it turned out for you! I love hearing your feedback and seeing your creations. Feel free to tag me on social media or drop a comment.
Finally, if you enjoyed this recipe and want to explore more: I’ve put together a list of my recommended baking tools and ingredients on Kit.co – check it out to see the exact tools I use in my kitchen. And if you love my content, you can support me on Ko-fi – any contribution helps me continue sharing recipes (and maybe buys me a coffee to fuel my late-night baking sessions!). 🥰
Thank you for reading and baking along with me. Now go enjoy that luscious milk bread! Happy baking, and until next time, 楽しんでね (tanoshinde ne) – enjoy! 🍞✨
Frequently Asked Questions


Leave a comment